Owner Account
Area Productivity -> Owner Account
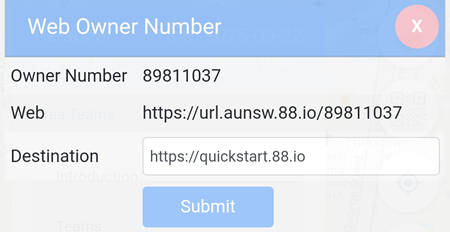
Area Alias ID-Based Web Redirection is now available for Area Alias users.
In the example below, accessing https://url.aunsw.88.io/89811037 will automatically redirect the user to https://quickstart.88.io.
Map Background
Please click here (Private Alias)
Text
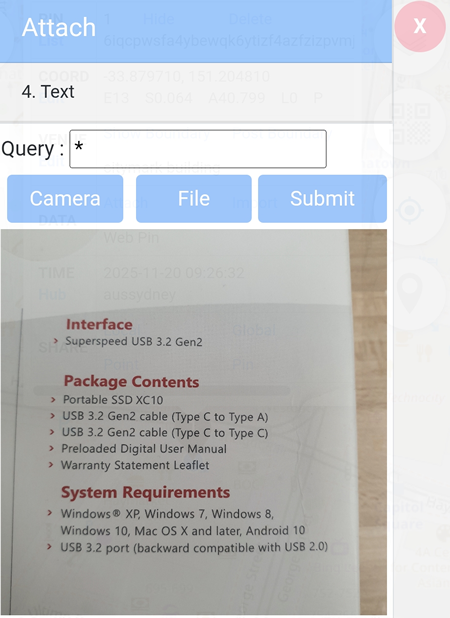
The Text Recognition feature allows text within captured photos to be automatically detected.
You can pick to supply the image either by Camera or by File by pressing the respective button.
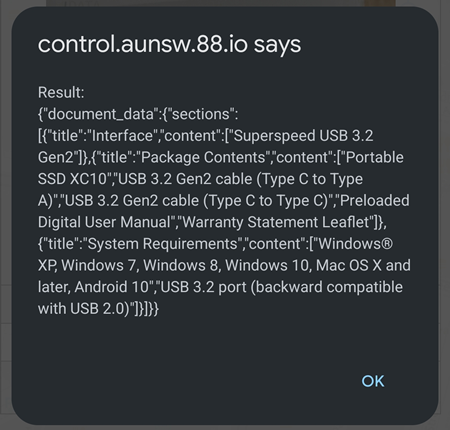
In the example below, a photo of a SSD package is supplied.
After clicking on the Submit button, a  pin will be added on the map, unless the Text menu is accessed by clicking on a Location Pin -> Attach -> Text.
In the example below, one photo is submitted.
Clicking on  -> Result will reveal the result of the text detected and for Community Alias users, the result will also be posted on https://hub.aunsw.88.io.
- Delete: This button deletes the photo taken, but the web pin will remain on the map.
- Hub0: The Hub0 will post the result to https://hub.aunsw.88.io (not available for Area Alias users).
- Result: This button displays the scores in more detail.
- Short Link: This button generates a one-off link, allowing other Community Alias users to view the photo on their Personal Console.
- Copy Last Short Link to Clipboard: This button copies the most recently generated short link to the clipboard.
Audio
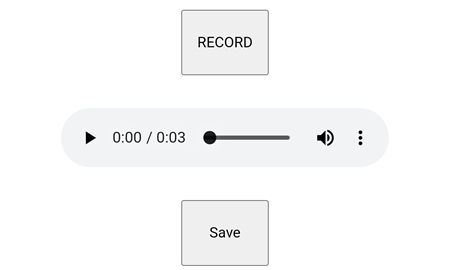
To attach an audio file to a web pin, click the Record button to start recording your audio.
Note: If prompted, allow https://audio.aunsw.88.io to access your microphone.
To listen to the recording, click on the  button.
If you are satisfied with the recording, click on the Save button to proceed and a pin will be added to the map.
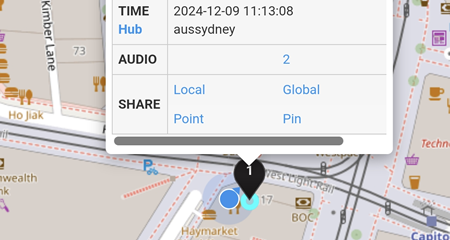
In the example below, two audio files are attached to the web pin.
Current Location
Please click here (Private Alias)
Add Pin
Please click here (Private Alias)
Location Pin
Please click here (Private Alias)
PIN
Please click here (Private Alias)
COORD
Please click here (Private Alias)
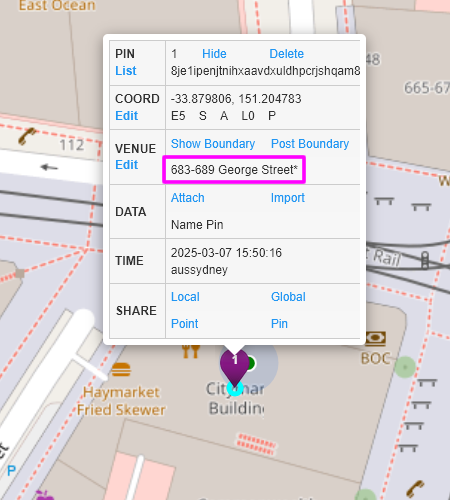
VENUE

The Edit button allows the current location pin’s venue to be replaced with another venue from the list.
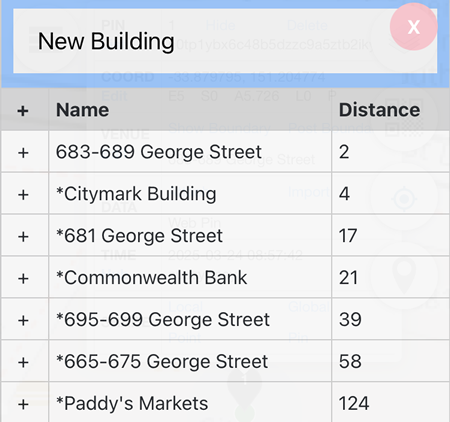
In the example below, several different venues are displayed.
Adding a new building or modifying an existing building is not available for Area Alias users.
Changing the Venue: To change the venue, click on the distance corresponding to the venue name.
In the example below, the venue name is changed from Citymark Building to 683-689 George Street (also indicated by the purple location pin) after clicking on 2 in the Distance (third) column.
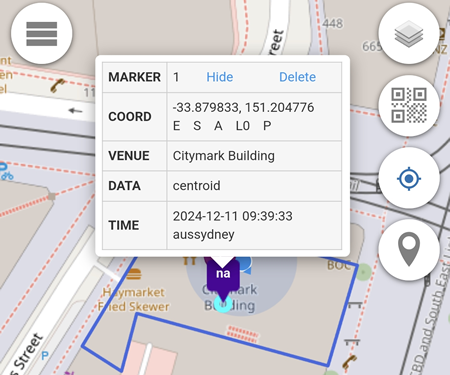
The Show Boundary option displays the venue boundary, if available, and the pin placement will be based on the venue’s centroid.
In the example below, the boundary of Citymark Building is shown.
The Post Boundary is not available for Area Alias users.
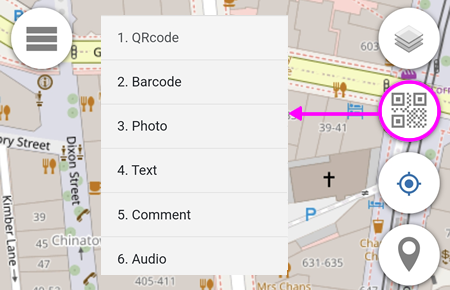
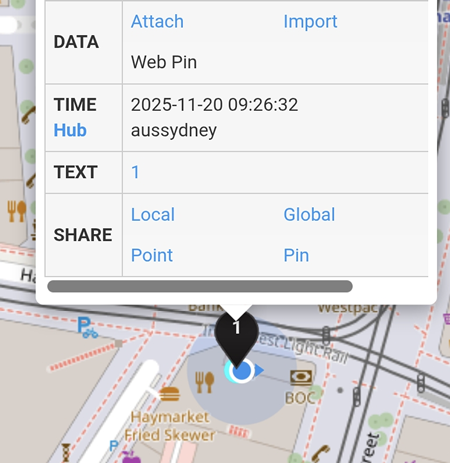
DATA
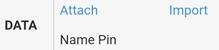
Attach
- QRcode
- Barcode
- Photo
- Text
- Comment
- Audio
- Marker
- Floorplan
- Boundary
- Scan
- Home
- Work
Import
Import is not available for Area Alias users.
Marker
The Marker feature is not available for Area Alias users.
Boundary
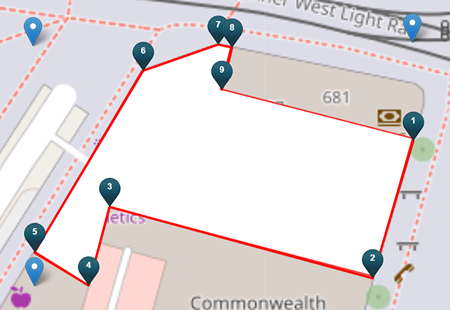
Define The Outline:
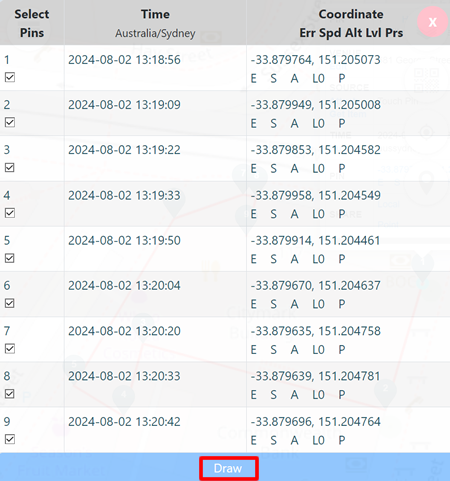
- Place the first Pin (e.g. Web Pin or Touch Pin) right on the boundary (seen as Touch Pin 1 in the image below)
-
Add additional Pins along the border of the building (seen as Touch Pins 2 to 9 in above image).
-
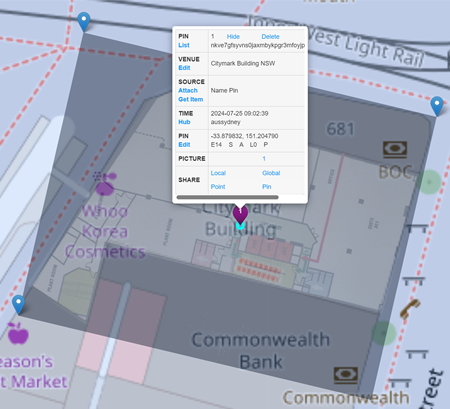
After ALL the required pins are added along the boundary, you can join them together into a boundary.
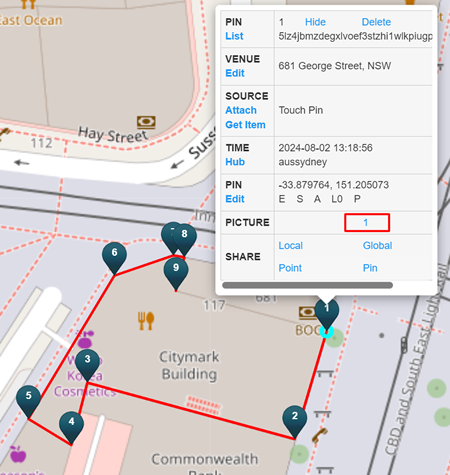
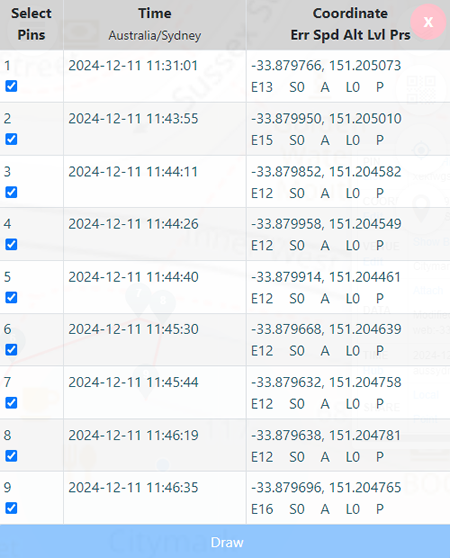
- Click on the Location Pin (pin 1) -> Attach -> Boundary -> Tick all Pins -> Draw
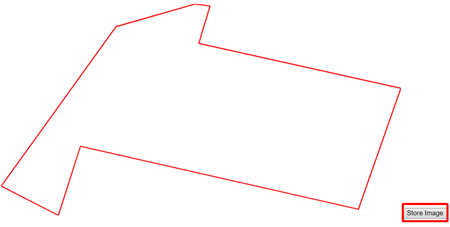
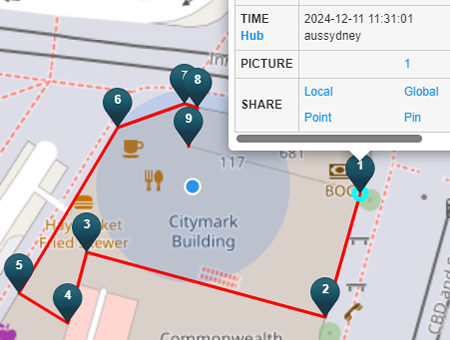
- Click on the Store Image button to save the boundary outline.
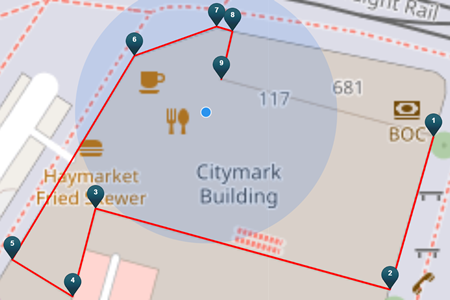
- When completed, the outline will be inside the Picture.
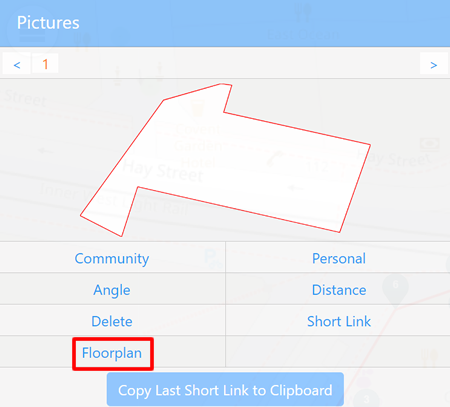
NOTE: some of the features inside the Picture are not available for Area Alias users.
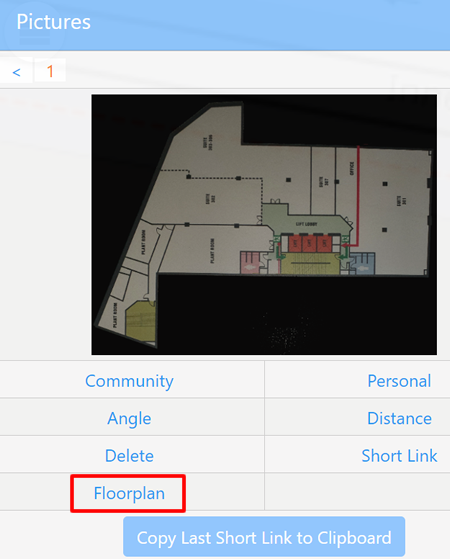
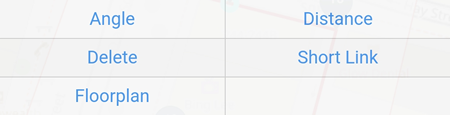
Angle: opens photo.aunsw.88.io which has the compass
Distance: measure the number of pixels between 2 points.
Delete: this is to delete the photo(s) in the Picture.
Short Link: generates a one-off link for other Community alias users to view the image.
Floorplan: using the photo(s) in the Picture as a floorplan.
Scan
Scan is not available for Area Alias users.
Home
Home is not available for Area Alias users.
Work
Work is not available for Area Alias users.
TIME
Please click here (Private Alias)
SHARE
Please click here (Private Alias)