Home Station

Compute in Every Home

The price performance ratio of mini-PCs have improved so much that it is now possible for every home to have its own Home Station.

A new Home Station suitable for up to 4 people can be purchased for less than A$200 (including tax and shipping).

1. Preloaded Software

Your country might already have some Private Cyberspace Infrastructure Assembler (e.g. oztralia.com in Australia) who will assemble a complete

GK3V_1

They will put together a Home Station for you, so you just need to plug it into your home network and it will work instantly.

Assembly rates can vary a lot due to resource availability and local competition (as at 2023-09-01 oztralia.com is charging A$18 per Home Station assembly).

2. Self-Load Software

If you don't mind doing some work yourself, assembling is a cheaper way of acquiring your own Home Station:

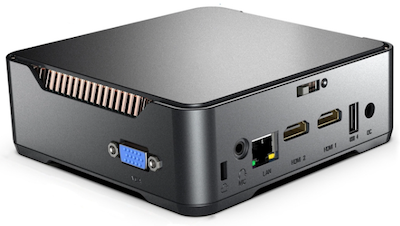
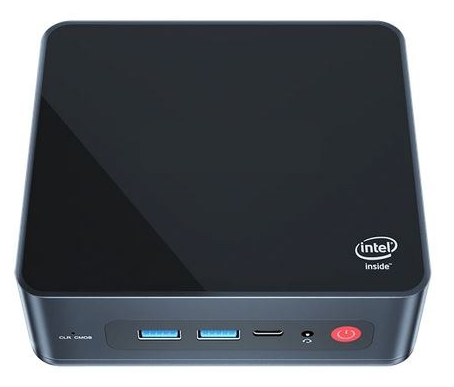
  1. Receive a mini-pc with preinstalled ram (at least 12 GB) and disk (at least 256GB)
  2. Receive a separate Boot SSD disk containing Home Station software
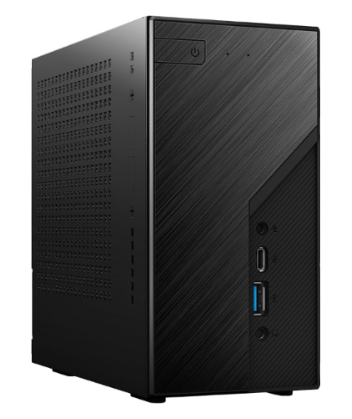
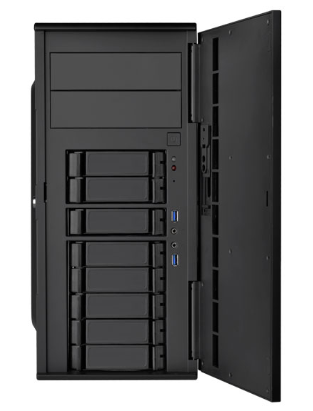
  3. Insert the Boot SSD into the mini-pc and attach it to the SATA cable inside
  4. Change BIOS setting to boot from the newly inserted Boot SSD

ssd_install

You simply need to insert the

3. Software

Currently Home Stations are all based on the 64-bit x86 architecture running at least Ubuntu 22.04 with 6.2 kernel.

There are plans to add Proxmox 8.0 as an alternative.

OZtralia X86 Release 1

Take the hassle out of building your own information infrastructure.
OZtralia provides preassembled and tested Home Station.

Home Station X86 Release 1 available from 2022-12-01.

X86 16G-1

x86_16g-1

X86 16G-1
Processor Intel J4125
RAM 16GB
WiFi 2.4 GHz and 5 GHz IEEE 802.11ac
Bluetooth 4
Ethernet 1 Gbps
USB 4 x USB 3.0
Power supply output voltage +12V DC
Output power (max) 24W
Output connector Barrel type
Input voltage 100-240Vac
Input frequency 50/60Hz
mSATA SSD 1 x 512GB encrypted Ubuntu (brand and model may vary)

X86 64G-1

x86_64g-1

X86 64G-1
Processor AMD Ryzen 5 5600G
RAM 64Gb
Ethernet 1 Gbps
USB 3 x USB 3.0, 1 x USB 2.0
Power supply output voltage +19V DC
Output connector Barrel type
Input voltage 100-240Vac (rated)
SATA SSD 1 x 500GB (brand and model may vary)
System On Modules Coral M.2 Dual Edge TPU

X86 128G-1

x86_128g-1

X86 128G-1
Case Silverstone CS380 Mid Tower
Processor AMD Ryzen 9 3900X
RAM 128Gb
Ethernet 1 Gbps
USB 7 x USB 3.0, 8 x USB 2.0, 1 x USB Type-C
Power supply 850W 80+ Gold
Input voltage 100-240Vac (rated)
SATA SSD 1 x 500GB (brand and model may vary)

Hardware Watchdog

Before deployment, x86 motherboards should have their Hardware Watchdogs tested. Intel calls them "TCO watchdog" stands for "Total Cost of Ownership".

Step 1: modprobe

modprobe i2c-i801
modprobe i2c-smbus
modprobe iTCO-wdt

The commands are case sensitive (uppercase matters) and will not produce output.

Step 2: dmesg

You should see some lines with "iTCO" in the "dmesg" output.

iTCO_wdt: Intel TCO WatchDog Timer Driver v1.11
iTCO_wdt: Found a Intel PCH TCO device (Version=4, TCOBASE=0x0400)
iTCO_wdt: initialized. heartbeat=120 sec (nowayout=0)

You need ALL 3 lines to be there.

Step 3: Test

cat >> /dev/watchdog
press "Enter" key twice

Wait while watchdog counts down, do NOT interrupt by pressing Control-C etc.
When twice the heartbeat value (120 sec in example above) has been exceeded, system should hard reboot! This system's hardware watchdog IS working.

If system stuck (e.g. hung at POST) turn it off, disconnect power for a few minutes and switch on again. This system's hardware watchdog is NOT working.

References

  1. Background Information
    https://datto.engineering/post/reliably-rebooting-ubuntu-using-watchdogs

  2. Timer built into some Intel CPU.
    e.g. https://www.intel.com/content/www/us/en/products/docs/processors/pentium/silver-celeron-datasheet-vol-1.html (section 3.7.2)