Angle and Distance Estimation
Distance Marker is an add-on to Image Markers, where the a standard length of an object in the photo is disclosed, so distance between the camera and the object can be calculated.
For example, doors are very often used as Image Markers since they are of similar sizes and universally available indoors across the world. However, a matching photo only indicates that the cameras are in similar location.
Distance Marker can increase the accuracy of Image Markers substantially by providing an exact distance from camera to the Image Marker, instead of just indicating that the mobile phone is "near" an Image Marker.
Distance Capture also enable Image Makers to be used from much further away, even outdoors, to provide backup geo positioning based on vision (in cases where GNSS satellites malfunction or are taken out by war).
visual reference point to a know location for the radio signals collected on the mobile phone.
Calibration Photo
Before taking distance measurement with the camera on your phone, you need to take a calibration photo to determine the Pixels to Metres Ratio of your camera.
This Pixels to Metres Ratio is unique to your camera and you (your height, the way you hold the camera etc.) and will be attached to your Alias. You can take a few more calibration photos to get an average value to increase accuracy, although this is generally not necessary.
Mark Door
Find a door and use a sticky tape or a pencil to make a mark on the vertical part of the door frame at a height of 1 meters from the floor (bottom of the door frame).
If you do not have the tools make your own 1 metre marker on the door frame, you can use the bottom of the door handle or door knob (which is normally approximately 1 metre above the floor).
Stand far enough from the door so the whole door is visible from the camera. Try to take the photo directly in front of the door at 90 degrees, but taking at an angle is also ok. Make sure that the begin and end points of that 2 meters (the mark and the floor) are clearly visible from the camera position.
Measure the distance on the floor between the camera and the door frame (with the marked 2 meters vertical length). Record this Floor Distance in meters for future use.
Take Photo
Take a photo of that 2 meters vertical length using the Photo feature of your Personal Console with the highest resolution camera available on your phone using portrait mode placing the door in the middle of the photo. The photo should show the whole door, with a little space above and below it and more spaces on either side of the door.
Do not use any zoom, you need to use the SAME magnification (focal length) every time.
Measure Pixel
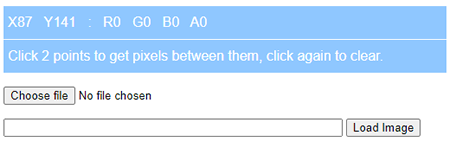
Transfer the resulting photo to the Measure Pixel program that comes with your Personal Console e.g. https://measure.aunsw.88.io/pixel/
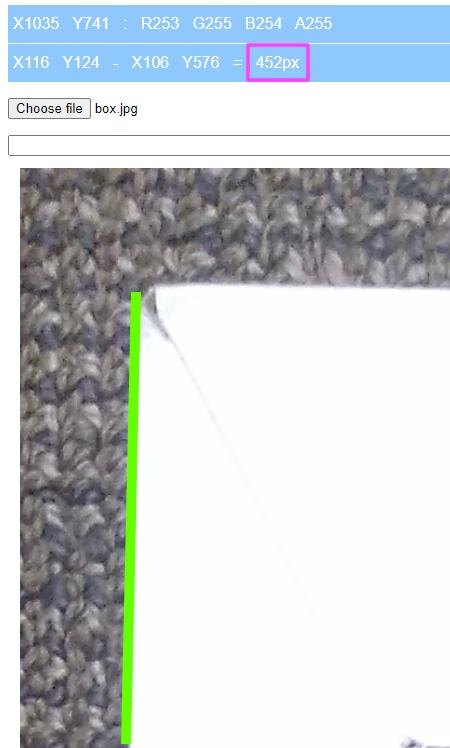
With the above Measure Pixel program, you just need to click the begin and end points of the 2 meter length and a green line will be drawn along the 2 meters from one point to another point, the pixels between those 2 points will also be shown to you.
Enter the Floor Distance you measured in step one above and the program will calculate and store the Pixel per Meter Ratio for your camera under your Alias.
Measure Distance
The Pixel per Meter Ratio that is now stored under your Alias can be used to with the length of any object in a photo to estimate the distance between the camera and that object.
If you have more than one camera in your phone, then you need to create a different calibration photo for each extra cameras (they cannot share the same calibration photos).
Due to differences in photographer heights and photo taking styles, other people using your phone to make distance measurements should use different Aliases with their own Pixel to Meter Ratios stored.
Receive New Coordinate
Software
Get Photo Marker coordinates using Camera coordinates.
Note the earth radius is not uniform, for use in these calculation default value is 6,371 km.
PHP
function calculateNewCoordinates($lat1,$long1,$d,$angle)
{
    # Earth Radius in KM
    $R = 6378.14;

    # Degree to Radian
    $latitude1 = $lat1 * (M_PI/180);
    $longitude1 = $long1 * (M_PI/180);
    $brng = $angle * (M_PI/180);

    $latitude2 = asin(sin($latitude1)*cos($d/$R) + cos($latitude1)*sin($d/$R)*cos($brng));
    $longitude2 = $longitude1 + atan2(sin($brng)*sin($d/$R)*cos($latitude1),cos($d/$R)-sin($latitude1)*sin($latitude2));

    # back to degrees
    $latitude2 = $latitude2 * (180/M_PI);
    $longitude2 = $longitude2 * (180/M_PI);

    # 6 decimal for Leaflet and other system compatibility
   $lat2 = round ($latitude2,6);
   $long2 = round ($longitude2,6);

   // Push in array and get back
   $tab[0] = $lat2;
   $tab[1] = $long2;
   return $tab;
 }
source: https://stackoverflow.com/a/26938066
Javascript
function calculateNewCoordinates(lat, lon, distance, bearing) {
    const R = 6371e3; // Radius of the Earth in meters
    const toRadians = degrees => degrees * Math.PI / 180;
    const toDegrees = radians => radians * 180 / Math.PI;

    const bearingRad = toRadians(bearing);
    const latRad = toRadians(lat);
    const lonRad = toRadians(lon);

    const newLatRad = Math.asin(Math.sin(latRad) * Math.cos(distance / R) +
                                Math.cos(latRad) * Math.sin(distance / R) * Math.cos(bearingRad));
    const newLonRad = lonRad + Math.atan2(Math.sin(bearingRad) * Math.sin(distance / R) * Math.cos(latRad),
                                          Math.cos(distance / R) - Math.sin(latRad) * Math.sin(newLatRad));

    const newLat = toDegrees(newLatRad);
    const newLon = toDegrees(newLonRad);

    return { latitude: newLat, longitude: newLon };
}

// Example usage:
const originalLat = 51.5074; // Original latitude (London)
const originalLon = -0.1278; // Original longitude (London)
const distance = 1000; // Distance in meters
const bearing = 90; // Bearing in degrees (East)

const newCoords = calculateNewCoordinates(originalLat, originalLon, distance, bearing);
console.log(newCoords);
