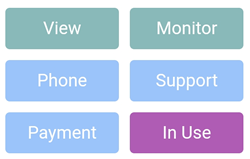
Event Teams
Teams
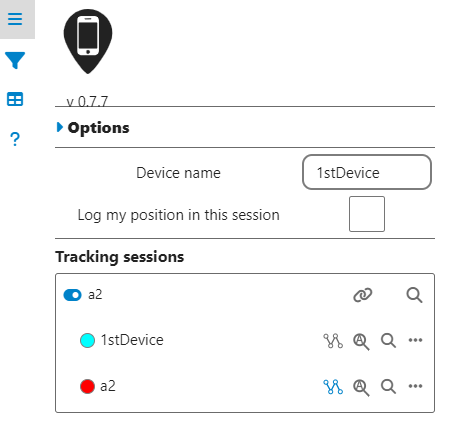
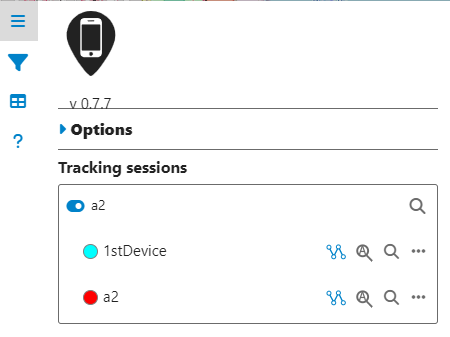
Three sets of Agents are available and they all have identical submenus. Agent cluster defines the Team used and by default, Team A is the active cluster in use.
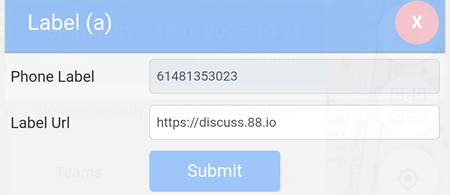
Event Teams -> Pin List
Pin List
Please click here.
Event Teams -> Government Area
Government Area
-
Speed Limit Alert
BEING DEVELOPED
-
Virtual Vaccine
BEING DEVELOPED
- Vaccination
Share, store and list the vaccination types and dates.
- Test
Share, store and list the PCR and/or Rapid Antigen test and dates.
- Quarantine
Share, store and list the Quarantine Start Date and End Date.
- Symptoms
Share, store and list the Symptoms including the Start Date and the End Date.
- Risks
Display areas of Covid positive cases in the last 28 days.
- Mask
Share, store and list the types of Mask used.
- Share
Share the type of identity and fuzziness.
-
Venue Permission
BEING DEVELOPED
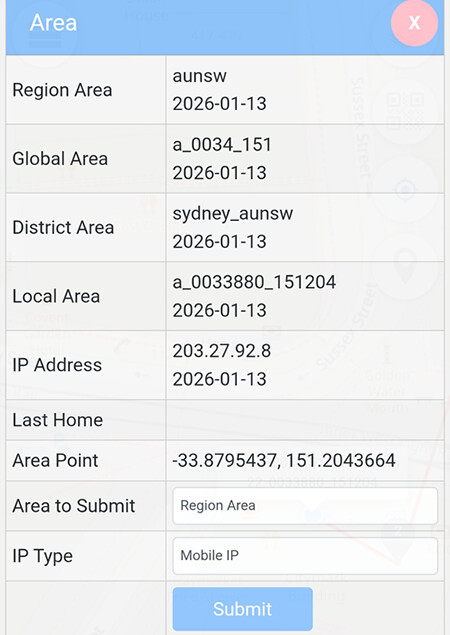
Event Teams -> Publish Pins
Publish Pins
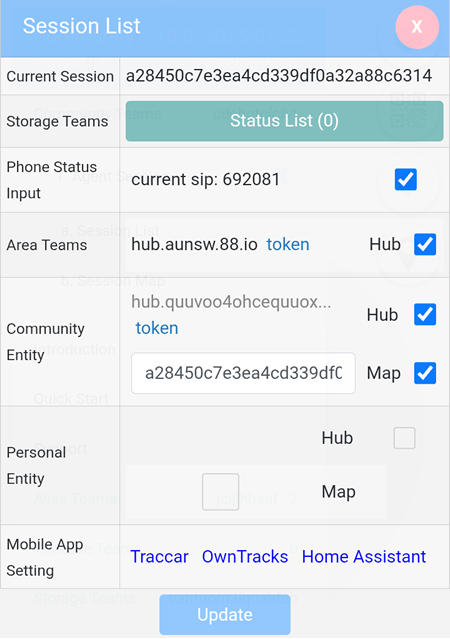
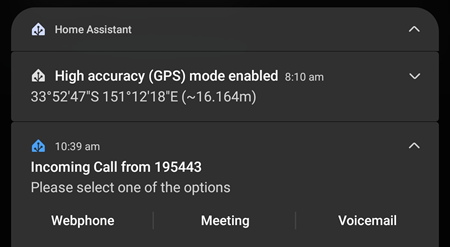
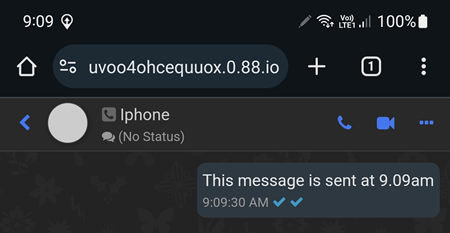
When ticked, the event will be submitted to the correspondent server location. In the example below, Status is ticked for Private which means the Status post will only be displayed on the owner's hub server on https://hub.quuvoo4ohcequuox.0.88.io.
Every time a Status is submitted on https://88.io, a post will be displayed on hub.quuvoo4ohcequuox.0.88.io
{	"subject" : "#loc_status",
	"type" : "#status",
	"pin" : "#pin_fn6eujfq0mxqmurk1bypfnikryzratb8ma4iegjp",
	"alias" : "#alias_m4zkq4bkawi8yiv4fg5eymltuvxartdygagr9joa",
	"event" : "#st_sqt",
	"blockid" : "#bi_zudohjv0cgu66hz9qw9piynhano4x0k4yrwkceam",
	"webid" : "#wi_xkknagahceyc46n7qur58h7wwrjon67xgkg1tszc",

	"srcname" : "88.io",
	"srcarea" : "#a_0033880_151204",
	"srctime" : "#t_1768343400",
	"srctx" : "#tx_ocfs4l2hnkw2fclopmw3zzlnonysdg8ynm3yq9v3",
	"srcsign" : "-aUJv6HMcdSdxTltU1FNvTh4zxsU559z3hVWYb4IOmKvQhj2wtxxQy8hVAN0BULfAcGiERslgiJ81suZYdtmCA",
	"factanchor" : "https://88.io?aunsw260113baujv6hmcds [88.io]"
}
Both Public and Event are used to send posts that will be displayed on https://hub.aunsw.88.io when selected. The difference is that Event is a shorter and simpler version of the post.
Event - simple version
{	"subject" : "#loc_pin",
	"webid" : "#wi_xkknagahceyc46n7qur58h7wwrjon67xgkg1tszc",

	"srcname" : "88.io",
	"srcarea" : "#a_0033880_151204",
	"srctime" : "#t_1768343400",
	"srctx" : "#tx_ocfs4l2hnkw2fclopmw3zzlnonysdg8ynm3yq9v3",
	"srcsign" : "8XED88gnYzHJ8uNV5qU3T0hL5EoXRHSRxp0Wdr56qZanUr83AMNXlAX0zP4lCQQgSnwDkPxZlU3ef7cS_DPzDA",
	"factanchor" : "https://88.io?aunsw2601138xed88gnyzh [88.io]"
}
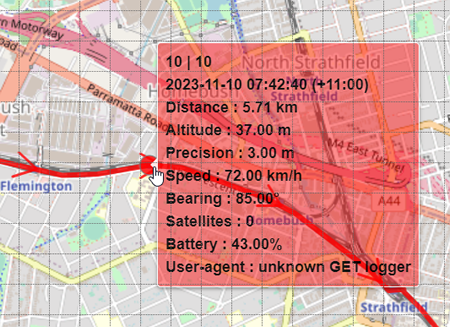
Public - detailed version
{	"subject" : "#loc_pin",
	"type" : "#pin",
	"pin" : "#pin_gmakizzbepadvtnab6yocnjuikksyfozbwxn05ds",
	"alias" : "#alias_m4zkq4bkawi8yiv4fg5eymltuvxartdygagr9joa",
	"blockid" : "#bi_zudohjv0cgu66hz9qw9piynhano4x0k4yrwkceam",

	"date" : "#dt_20260113",

	"lat" : "-33.8797840",
	"lon" : "151.2048400",
	"ts" : "1768344760424",
	"alt" : "",
	"spd" : "0",
	"accu" : "6.000",
	"brg" : "null",
	"webid" : "#wi_xkknagahceyc46n7qur58h7wwrjon67xgkg1tszc",

	"srcname" : "88.io",
	"srcarea" : "#a_0033880_151204",
	"srctime" : "#t_1768343400",
	"srctx" : "#tx_ocfs4l2hnkw2fclopmw3zzlnonysdg8ynm3yq9v3",
	"srcsign" : "Zmwsui8e-I38hEkM_kqXAgvPMZidwLtY5u1Y9-Sdqt1BSHIQK7PlAJ5Y_LoLUWFpeC3FD-WrZ84o2C5et-4lDw",
	"factanchor" : "https://88.io?aunsw260113zmwsui8ebi3 [88.io]"
}
Public and Audit - detailed version
{	"subject" : "#loc_pin",
	"type" : "#pin",
	"pin" : "#pin_4q8ea4h1vchus37hiypdsof1tk46ttl32w5z8zvg",
	"alias" : "#alias_m4zkq4bkawi8yiv4fg5eymltuvxartdygagr9joa",
	"blockid" : "#bi_zudohjv0cgu66hz9qw9piynhano4x0k4yrwkceam",

	"date" : "#dt_20260113",

	"lat" : "-33.8797840",
	"lon" : "151.2048400",
	"ts" : "1768344725153",
	"alt" : "",
	"spd" : "0",
	"accu" : "6.000",
	"brg" : "null",
	"webid" : "#wi_xkknagahceyc46n7qur58h7wwrjon67xgkg1tszc",
	"audit" : "Y",

	"srcname" : "88.io",
	"srcarea" : "#a_0033880_151204",
	"srctime" : "#t_1768343400",
	"srctx" : "#tx_ocfs4l2hnkw2fclopmw3zzlnonysdg8ynm3yq9v3",
	"srcsign" : "EfceANcrmdMFbBbDurjJvX8JMUlMrwt6KA9WcdjyrHA7BsmZtVJnkbAmCQLFPinxQiqVq1jfCi8TjySZi4ufCQ",
	"factanchor" : "https://88.io?aunsw260113efceancrmdm [88.io]"
}
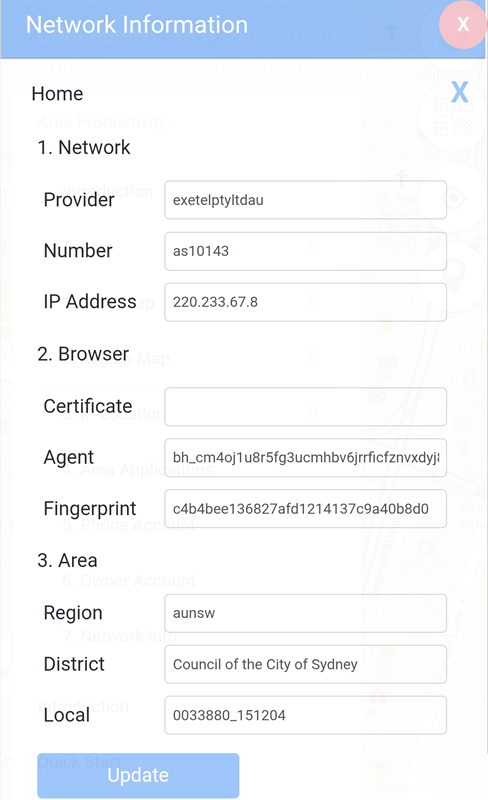
By default, all are set to Local. The other options are Global, Local Hash and Global Hash.
Global
{	"subject" : "#loc_pin",
	"type" : "#pin",
	"pin" : "#pin_z4s8jm5jnzkzdqupj3czwthcxinotjfwzezlcnkz",
	"alias" : "#alias_m4zkq4bkawi8yiv4fg5eymltuvxartdygagr9joa",
	"blockid" : "#bi_zudohjv0cgu66hz9qw9piynhano4x0k4yrwkceam",

	"date" : "#dt_20260113",

	"lat" : "-33.8797840",
	"lon" : "151.2048400",
	"ts" : "1768344626783",
	"alt" : "",
	"spd" : "0",
	"accu" : "6.000",
	"brg" : "null",
	"webid" : "#wi_xkknagahceyc46n7qur58h7wwrjon67xgkg1tszc",
	"audit" : "Y",

	"srcname" : "88.io",
	"srcarea" : "#a_0034_151",
	"srctime" : "#t_1768300000",
	"srctx" : "#tx_ocfs4l2hnkw2fclopmw3zzlnonysdg8ynm3yq9v3",
	"srcsign" : "_FeCjIMTmveBAcNjlMFEXPVUJ829DPSStFhYuMnAMi-LcGQArsDtlP8ym3PBSz8aR_YSC4t5WTRNPrZKxjphBQ",
	"factanchor" : "https://88.io?aunsw260113afecjimtmve [88.io]"
}
Local Hash
{	"subject" : "#loc_pin",
	"type" : "#pin",
	"pin" : "#pin_jy7qg8lcuk3aioxe2o1padzsjimeb7j4ui0qiquw",
	"alias" : "#alias_m4zkq4bkawi8yiv4fg5eymltuvxartdygagr9joa",
	"blockid" : "#bi_zudohjv0cgu66hz9qw9piynhano4x0k4yrwkceam",

	"date" : "#dt_20260113",

	"lat" : "-33.8797840",
	"lon" : "151.2048400",
	"ts" : "1768344669365",
	"alt" : "",
	"spd" : "0",
	"accu" : "6.000",
	"brg" : "null",
	"webid" : "#wi_xkknagahceyc46n7qur58h7wwrjon67xgkg1tszc",
	"audit" : "Y",

	"srcname" : "88.io",
	"srcarea" : "#a_2tiINkhXPdlO1Z_f-RRFnmWS7PCYMbmyir1VVVpS",
	"srctime" : "#t_1768343400",
	"srctx" : "#tx_ocfs4l2hnkw2fclopmw3zzlnonysdg8ynm3yq9v3",
	"srcsign" : "EwmDjL9k_7fOqcplkrkuAjszBJA8TuV8cBbrNJw02Dsj-mx1QZDYfFHB7_cPBlmE5LAyYoRi5Lw7Gbye7oydDQ",
	"factanchor" : "https://88.io?aunsw260113ewmdjl9ka7f [88.io]"
}
Global Hash
{	"subject" : "#loc_pin",
	"type" : "#pin",
	"pin" : "#pin_s0hapovfxmcbmdprtjxbbsq9tc64sqa4zl9a2zrv",
	"alias" : "#alias_m4zkq4bkawi8yiv4fg5eymltuvxartdygagr9joa",
	"blockid" : "#bi_zudohjv0cgu66hz9qw9piynhano4x0k4yrwkceam",

	"date" : "#dt_20260113",

	"lat" : "-33.8797840",
	"lon" : "151.2048400",
	"ts" : "1768344556340",
	"alt" : "",
	"spd" : "0",
	"accu" : "6.000",
	"brg" : "null",
	"webid" : "#wi_xkknagahceyc46n7qur58h7wwrjon67xgkg1tszc",
	"audit" : "Y",

	"srcname" : "88.io",
	"srcarea" : "#a_Kro_KE6F02yuWl4DvKH_vm5Ibh_JIdpCkHyMWihY",
	"srctime" : "#t_1768300000",
	"srctx" : "#tx_ocfs4l2hnkw2fclopmw3zzlnonysdg8ynm3yq9v3",
	"srcsign" : "MkuvNxweTxQDepax_3UIrS2c7BHq-4GL1adus21ehPzJs4eq4g1NGlixp9Cunhwkn0cICg14-fZApolMfIw2Bw",
	"factanchor" : "https://88.io?aunsw260113mkuvnxwetxq [88.io]"
}
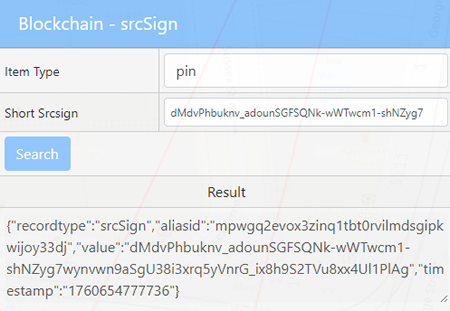
Event Teams -> Blockchain
Blockchain
Requirement: Event Teams -> Publish Pins -> Public/Private/Event and Audit must be ticked.
This feature allows users to verify the authenticity of a signature by using the srcsign obtained from either hub.aunsw.88.io or hub.quuvoo4ohcequuox.0.88.io
In the example below, the Pin is verified against the srcsign value:
dMdvPhbuknv_adounSGFSQNk-wWTwcm1-shNZyg7wynvwn9aSgU38i3xrq5yVnrG_ix8h9S2TVu8xx4Ul1PlAg
This signature is automatically trimmed to the first 40 characters for verification purposes:
dMdvPhbuknv_adounSGFSQNk-wWTwcm1-shNZyg7

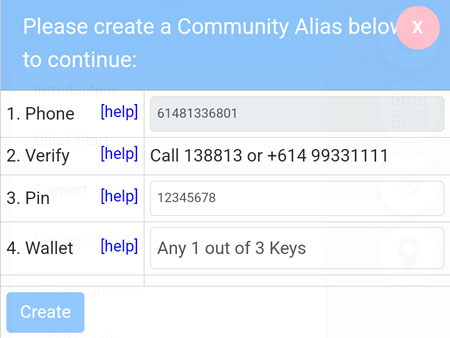
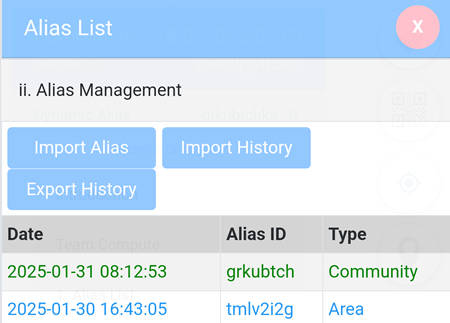
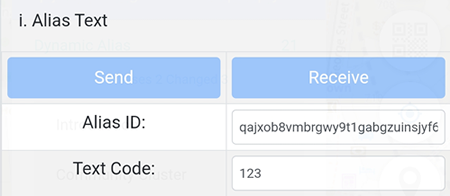
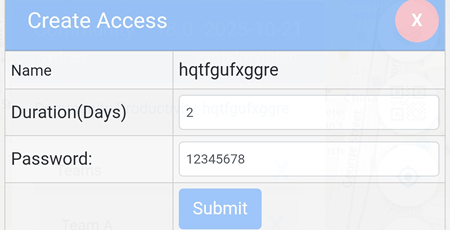
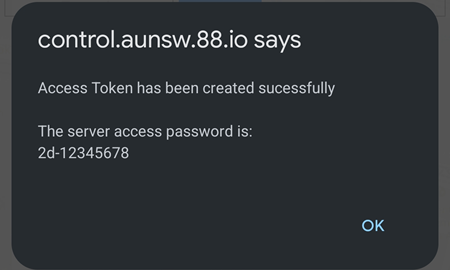
 button located at the top left hand corner, then click on Identity Teams -> Alias List -> Create Alias -> click on the
  button which will turn to
 button and follow the prompt.