Nextcloud Android Apps

Currently your Data Node is based on the open sourced Nextcloud software.

Nextcloud supports a number of Android mobile apps, however the only mandatory installations are the Nextcloud File Application and the DAVx5 Application. Other related Android apps can be used, but without universal support.

1. Mandatory Android Applications

1.1. File Android Application

1.2. DAVx5 Android Application

1.3. Configuration Steps

  1. Account Setup - Nextcloud Android Apps - #2 by oztralia
  2. File Synchronisation - Nextcloud Android Apps - #3 by oztralia
  3. Contact Synchronisation - Nextcloud Android Apps - #4 by oztralia
  4. Calendar Synchronisation - Nextcloud Android Apps - #5 by oztralia

2. Other Android Applications

Other Nextcloud Applications that will work with your Data Node are available and may be supported by individual communities but they are NOT part of the universally supported software set.

  1. Nextcloud Talk - Nextcloud Android Apps - #6 by oztralia
  2. Nextcloud Deck - Nextcloud Android Apps - #6 by oztralia

Nextcloud Account Set Up

Note: the server address below is for Community alias users only. For Personal alias users, the server address is https://data-bohcif8iew8e.jeiheaxi2iu4phea.1.88.io

After the app has been installed:

  1. Select the android_login_button button
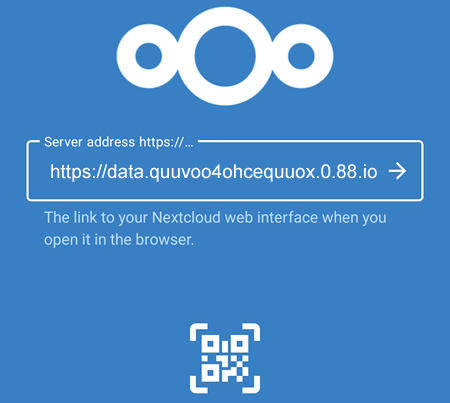
  2. Put https://data.quuvoo4ohcequuox.0.88.io in the server address field and tap on the android_right_arrow button.

nextcloud_server

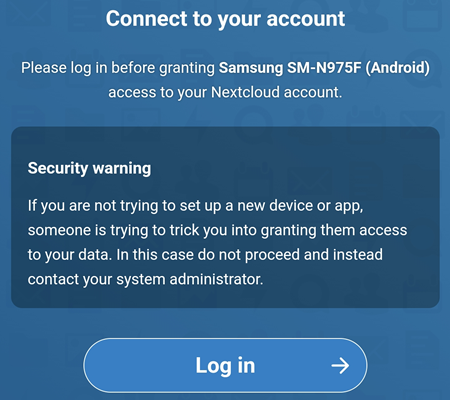
  1. There might be a warning as shown below. Simply tap on the Log in button to continue.

android_security_warning

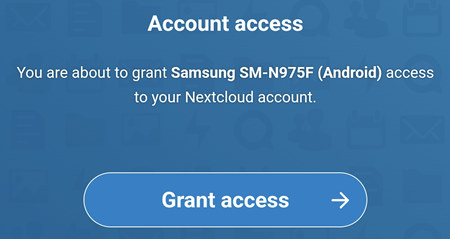
  1. Enter the Nextcloud Username and Password, tap on the Log in button and select the Grant Access button. The Username and Password can be found on https://aunsw.88.io -> Dynamic Alias -> Alias Details -> Hub Info (the same Username and Password for https://hub.quuvoo4ohcequuox.0.88.io

android_grant_access

Nextcloud File Synchronisation

You can select individual folders on your Android mobile phone so files inside are AUTOMATICALLY UPLOADED to your Nextcloud server.

Defining Steps

  1. On the upper left corner, select the button button and go to Settings.
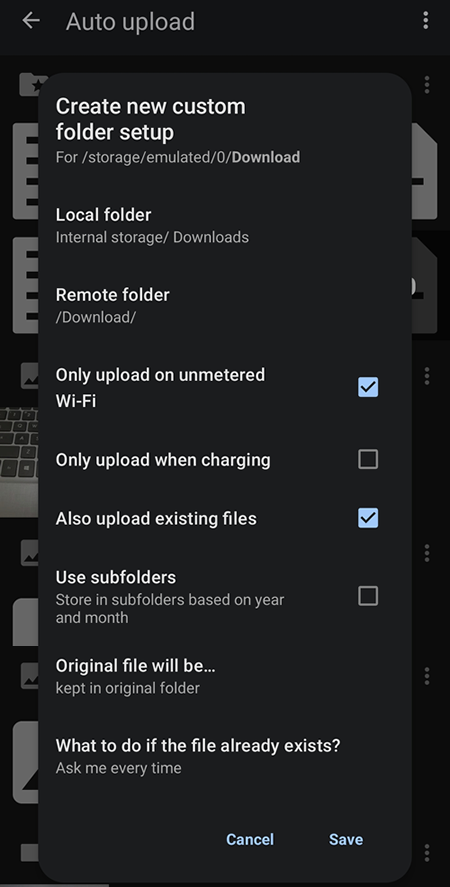
  2. Select Auto upload, then 3dots button and Set up a custom folder. If prompted, give full permission to the Nextcloud app.
  3. Browse to the Local folder location and the Remote folder location and click on the Save button. In the example below, the Auto upload is enabled on the Download folder.

android_auto_upload

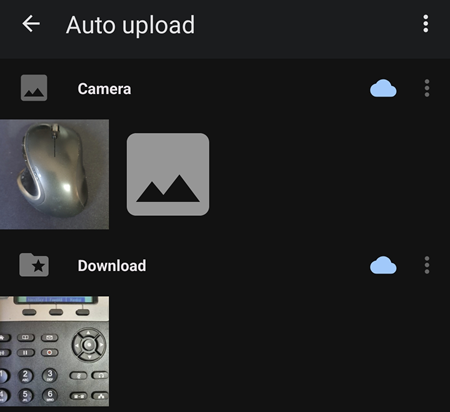
  1. If successfully configured, the Download folder will be shown. To enable Auto upload, click on the "cloud" icon next to the folder name(s) so it becomes blue. In the example below, the folders enabled are the Camera folder (automatically detected) and the Download folder (Custom folder)

android_auto_upload_enabled

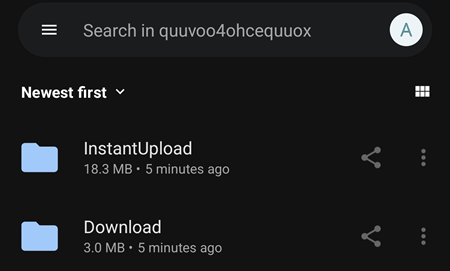
  1. A folder called InstantUpload will be used for files located in the non Custom folder and for files located in the "Custom folder", they will be placed accordingly, example in the Download folder..

android_remote_folders

Recommended Folders

The following folders should be set up with automatic upload to your Private Cyberspace (the Nextcloud server).

  1. DCIM - your photos
  2. Documents - files from 88.io application
  3. Download - files from personal console

DAVx⁵

Note: the server address below is for Community alias users only. For Personal alias users, the server address is https://data-bohcif8iew8e.jeiheaxi2iu4phea.1.88.io

The DAVx⁵ mobile app can be used to synchronise your contacts and calendar data between your Android mobile phone and the Nextcloud Server.

DAVx⁵ Set Up

  1. Install DAVx⁵ on your Android device from DAVx⁵ | F-Droid - Free and Open Source Android App Repository
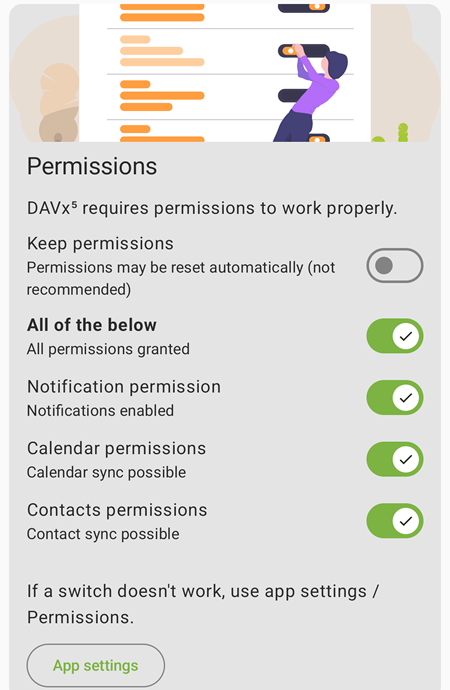
  2. Enable the permissions as shown below.

davx_permission

  1. Add Account by clicking on the + Create Account button
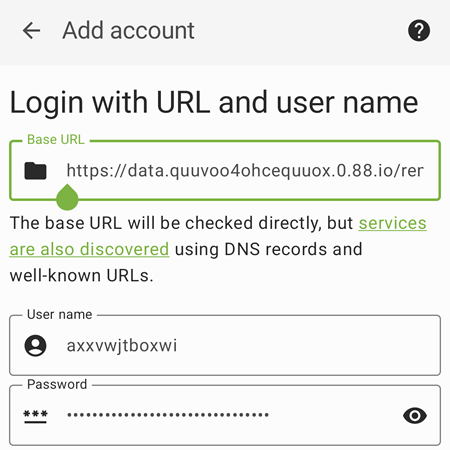
  2. Select Login with URL and user name. If there is a Security Warning, just proceed by clicking on the Log In button. The Base URL is https://data.quuvoo4ohcequuox.0.88.io/remote.php/dav/principals/users/axxvwjtboxwi where axxvwjtboxwi is the User name.

davx_account_creation

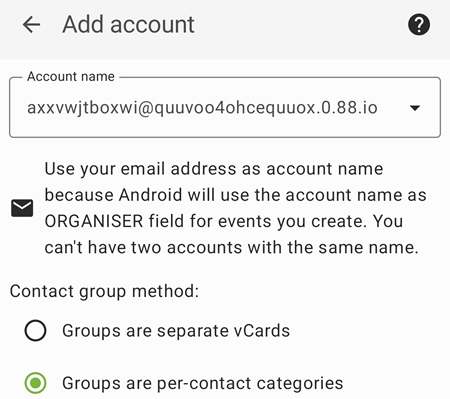
  1. DAVx⁵ will open and prompt to create an account. Select the account name and set Contact Group Method to Groups are per-contact categories. In the example below, the account name is axxvwjtboxwi@quuvoo4ohcequuox.0.88.io

davx_create_account

  1. Close the DAVx⁵ app and launch the DAVx⁵ app again.
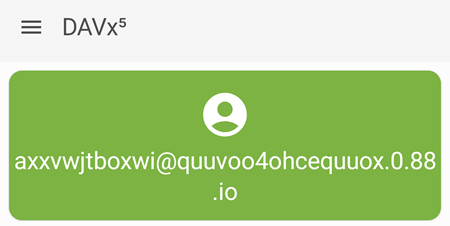
  2. Click on the icon for the account DAVx⁵ has just created, In the example below, the account created is axxvwjtboxwi@quuvoo4ohcequuox.0.88.io

davx_axxvwjtboxwi

Address Book

All the address books are shown on the CardDAV main page. By default, two address books are created automatically:

  1. Accounts, which lists all the session IDs created for all users. These are READ ONLY, so any session ID/contact deleted from this address book, it will re-appear.
  2. Contacts, which allow users to add, edit and delete their contacts and can be synced to other devices.

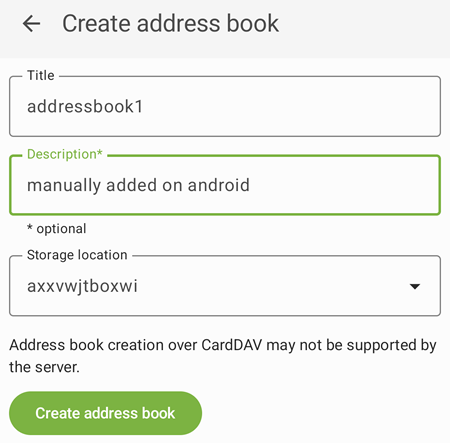
To add an address book, click on the 3dot button on the top right hand corner and select Create address book. Enter the Title and the Description and click on the create_address_book_davx button.

In the example below, the address book being created is called

address_book_android

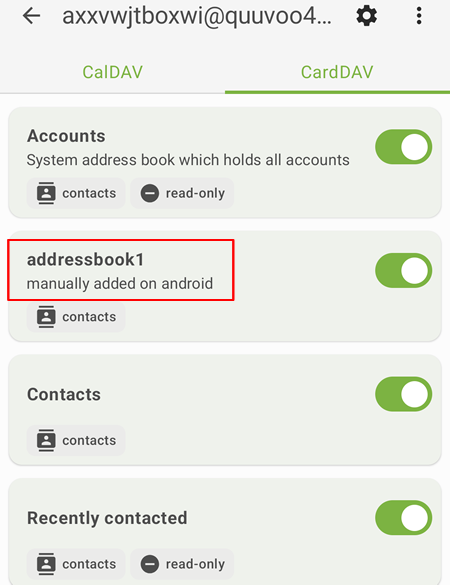
If successful, the newly created address book will appear on the main CardDAV page

newly_created_address_book

NOTE: once created, the address book name CAN NOT be edited but it can be deleted on the device where the DAVx app is installed, but not by an iOS device.

On Android devices, some of the names used are different to devices on iOS and Nextcloud

android ios nextcloud
first name first name name
surname last name name
title job title title
email email email
company company company
website url website
labels contact groups

Shared Address Books

Shared Address Books can only be configured from Nextcloud, however once configured, they are also available on Android and iOS devices and the contacts inside the shared address books can be edited and deleted.

Category Fields

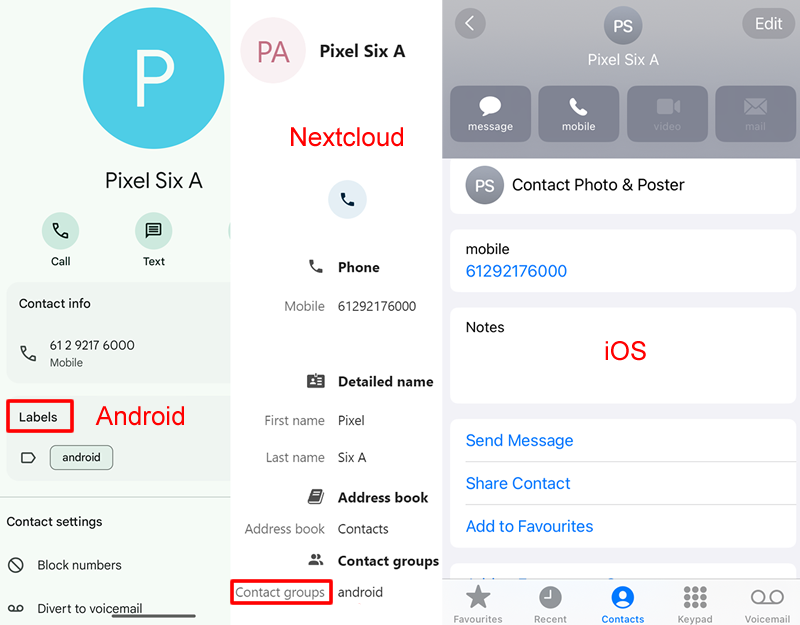
In the test below, the category used is the same, however the category name is different on different devices:

  • Labels on Android
  • Contact groups on Nextcloud
  • Not supported on iOS

category

Title and Organisation Fields

In the test below:
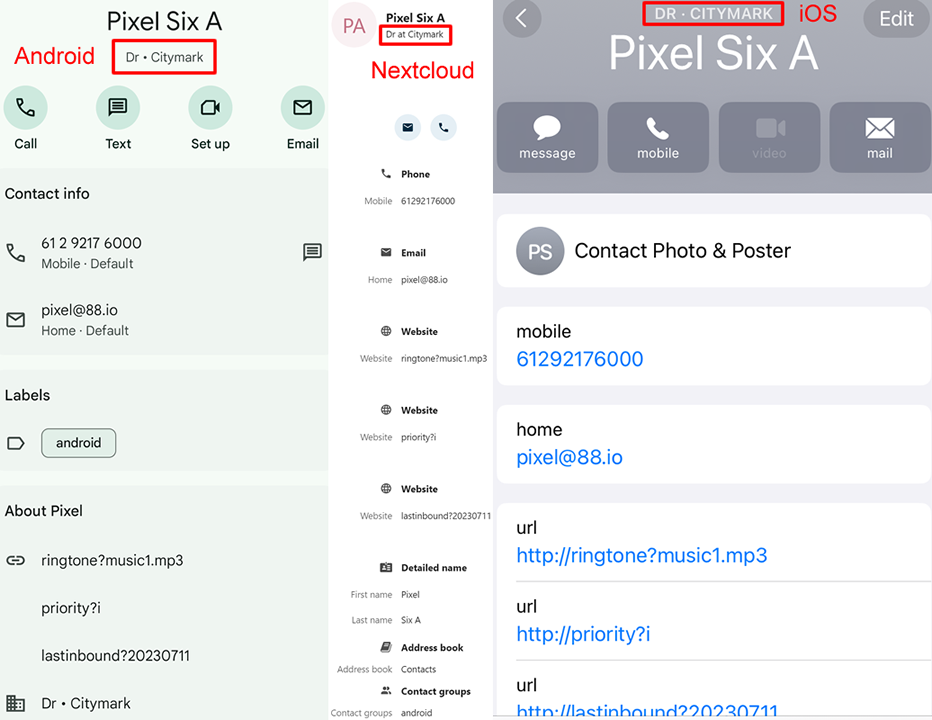
Title: Dr
Company: Citymark

Dr (with capital D) appears exactly on Android and Nextcloud. However, on iOS, each letter is capitalised so it is DR

Citymark (with capital C) appears exactly on Android and Nextcloud. However, on iOS, each letter is capitalised so it is CITYMARK

organisation

Contacts Synchronisation

To sync, simply click on the sync_now button at the bottom right hand corner.

Nextcloud Talk

The app can be download from:

  1. Google Play
    https://88.io/andnt
  2. F-Droid
    Nextcloud Talk | F-Droid - Free and Open Source Android App Repository

Account Set Up

Note: the server address below is for Community alias users only. For Personal alias users, the server address is https://data-bohcif8iew8e.jeiheaxi2iu4phea.1.88.io

After the app has been installed:

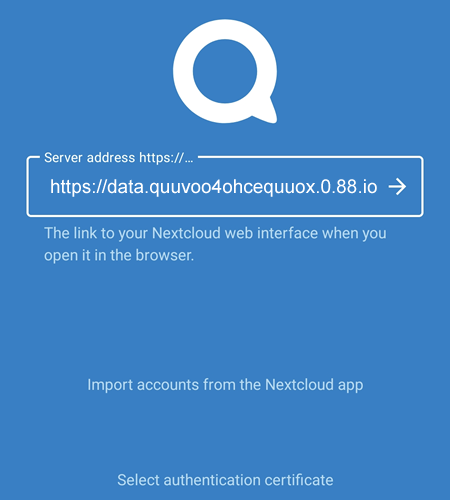
  1. Enter the server address https://data.quuvoo4ohcequuox.0.88.io and click on the android_nextcloud_arrow button.

nextcloud_talk

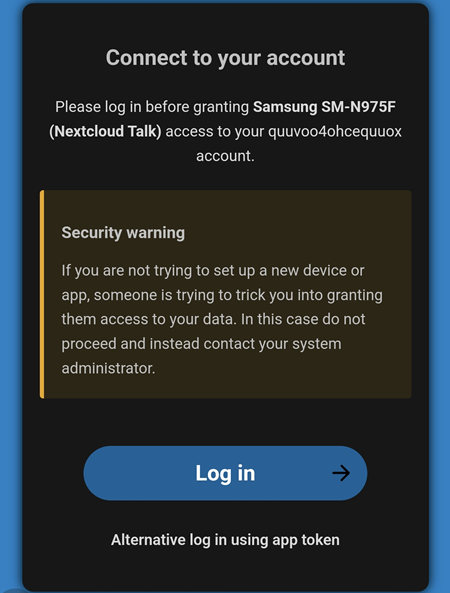
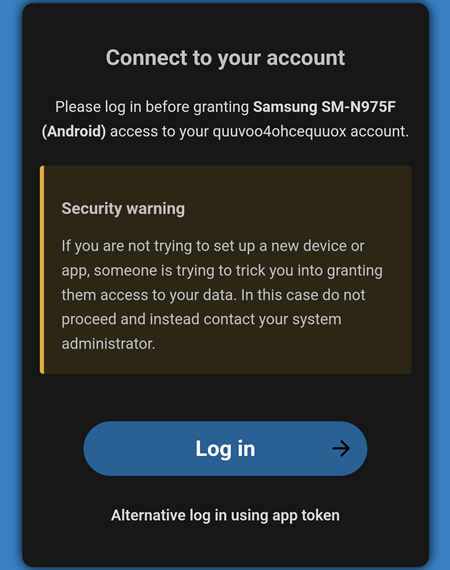
  1. Click on the Log in button.

android_talk_login

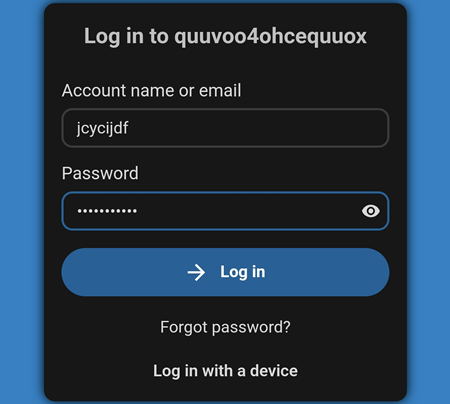
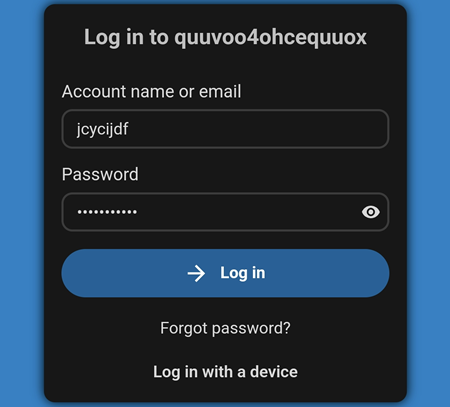
  1. Enter the account name and password. In the example below, the account name is jcycijdf.

android_nextcloud_username

  1. Grant access to the device.

Usage

  1. Click on the android_nextcloud_talk_+ button to select the user that you want to chat or call.
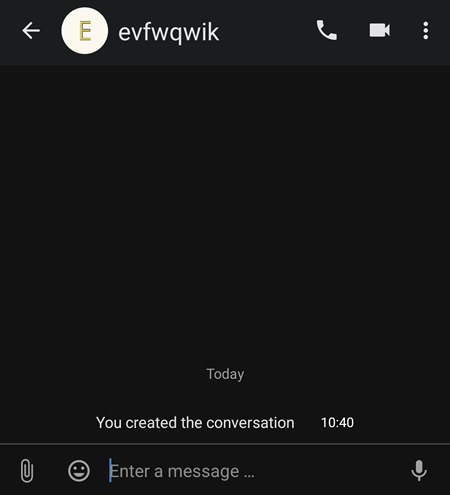
  2. Once the user has been selected, you can send a text message, make an audio call or make a video call. In the example below, the user selected is evfwqwik.
  3. To send a text message, type your message at the bottom of the screen. To make an audio call, select the android_nextcloud_audio button and to make a video call, select the android_nextcloud_video button.

android_nextcloud_talk2

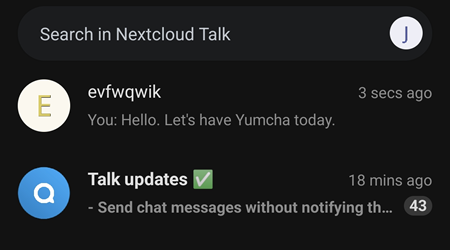
  1. Once a message or a call has been made, it will be shown in the chat history.

android_nextcloud_talk_history

Please note:

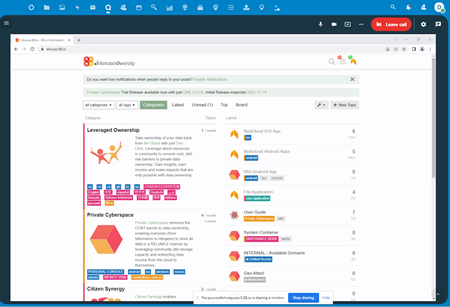
The Screen Sharing feature can only be initiated from Windows devices as shown in the image below.

win_screen_sharing

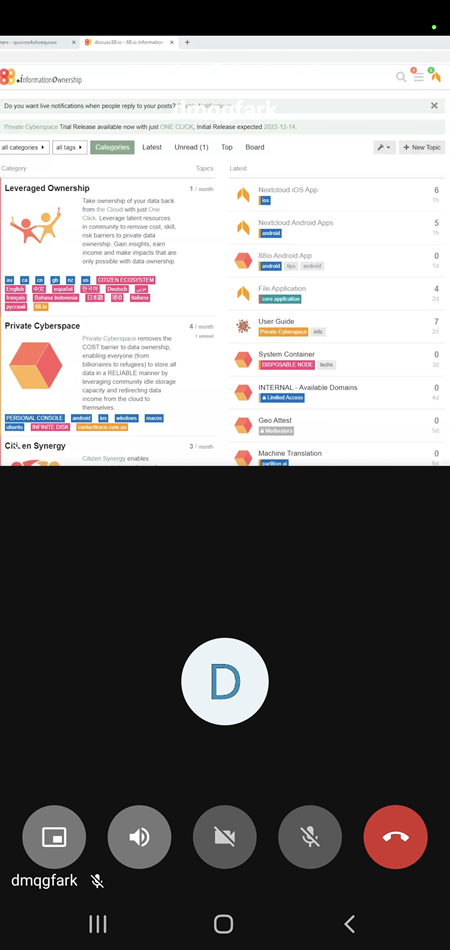
For mobile devices, it is View mode only. The image below is how it appears on an Android device where dmqgfark is the Windows user who is sharing the screen.

android_screen_sharing_view

Nextcloud Deck

The app can be downloaded from

  1. F-Droid
    Nextcloud Deck | F-Droid - Free and Open Source Android App Repository

Account Set Up

Note: the server address below is for Community alias users only. For Personal alias users, the server address is https://data-bohcif8iew8e.jeiheaxi2iu4phea.1.88.io

After the app has been installed:

  1. Enter the server address https://data.quuvoo4ohcequuox.0.88.io and click on the android_nextcloud_arrow button.

nextcloud_deck

  1. Click on the Log in button.

android_deck_login

  1. Enter the account name and password. In the example below, the account name is jcycijdf.

android_deck_username

  1. Grant access to the device.

Usage

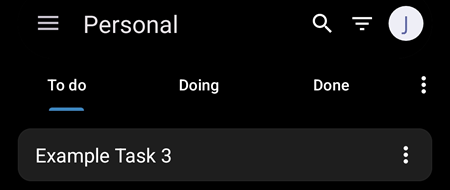
  1. If prompted, allow Nextcloud Deck permission request. If successfully logged in, the image below will be displayed.

android_nextcloud_deck2

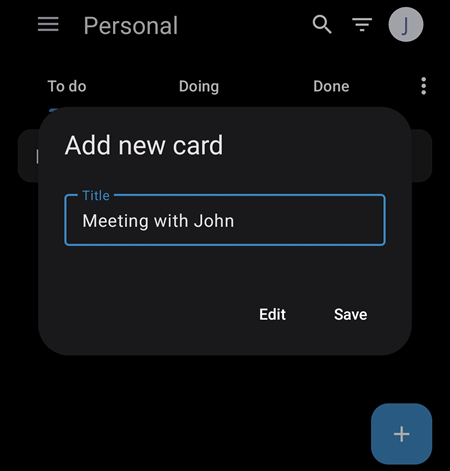
  1. To add a new card, click on the android_nextcloud_talk_+ button and enter the Title name. In the example below, the title is "Meeting with John". Click on Save to continue.

android_deck_card

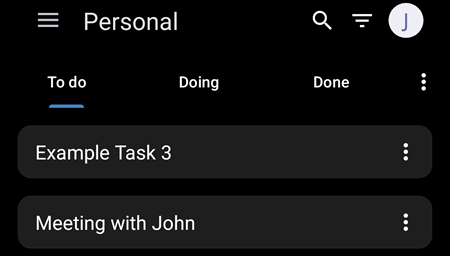
  1. Once saved, the card will be shown on the page. By clicking on the card name, e.g: Meeting with John, the user will be able to add more details such as the Due Date, Description, Comment etc.

android_deck_card_entered