Data Node is the centre of your Private Cyberspace, where ALL your data resides.
1. Features
Currently Data Node is based on Nextcloud All-in-One, by default some features are turned off on machines with less than 4GByte of RAM and when required can be turn on manually for those machines.
Select Access Anonymously (access is limited to a maximum of 60 minutes) or Access with your Alias. When choosing "Access with your Alias", the password is the access token password and the access duration is based on the duration set by the owner of the account, which has a minimum of 1 day. Select the Submit button.
Enter the Nextcloud Username and Password.
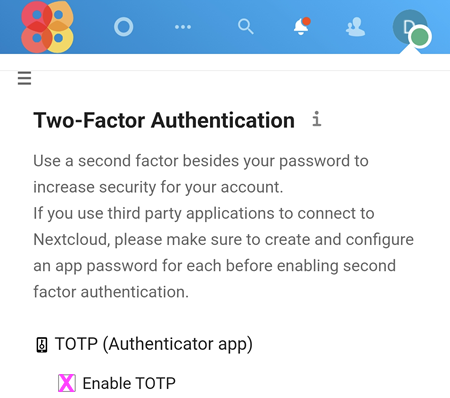
2-Factor Authentication (optional)
Setup
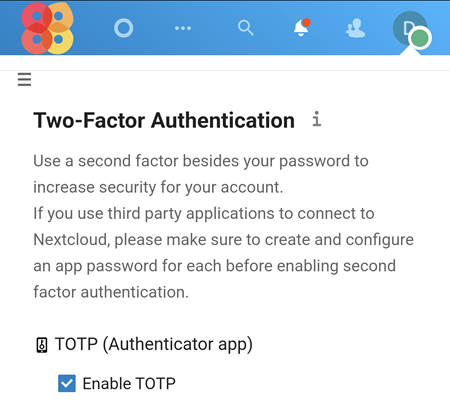
After logging on to Nextcloud, go to Settings and select the button on the upper top left.
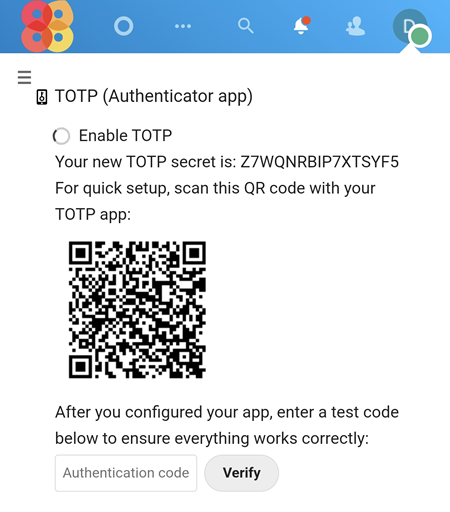
Navigate to Security and select ENABLE TOTP
Copy the TOTP secret. In the example below, the TOTP secret is Z7WQNRBIP7XTSYF5
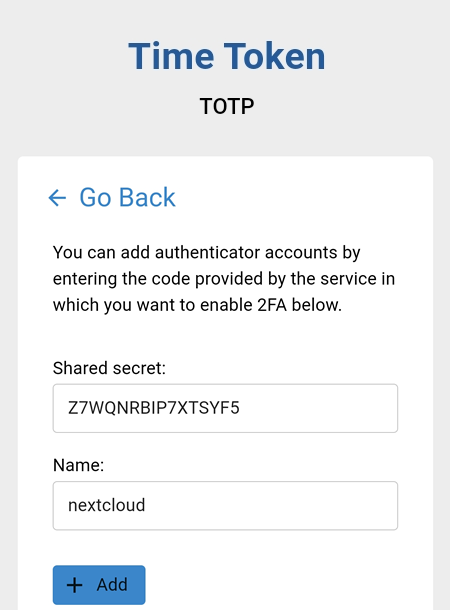
Paste the TOTP secret into the Shared secret field. The Name field is used to identify the site that uses it. In the example below, the site is nextcloud . Press the to continue.
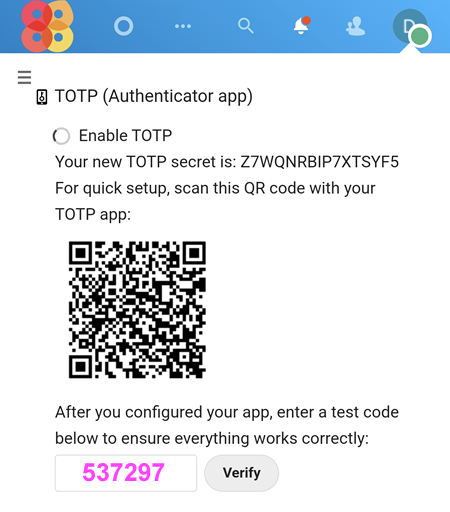
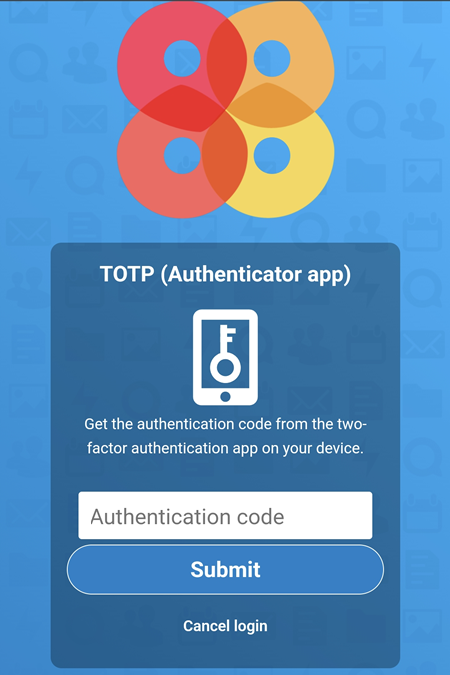
If successful, the One Time Password will be shown and it changes every 30 seconds.
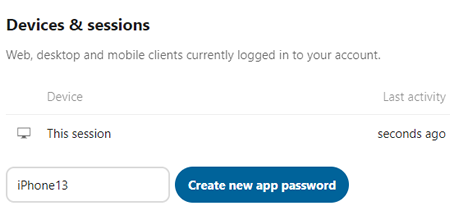
At the bottom of the list you find a button to create a new device-specific password. The generated password is used for configuring the new client. Ideally, generate individual tokens for every device you connect to your account, so you can disconnect those individually if necessary.
Enter the device name. In the example below the name used is iPhone13.
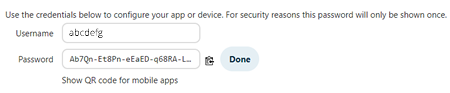
Click on the Create new app password button. If prompted enter the web authentication password. The app username and password will be displayed as in the example below. Click on the Done button.
If successful the entry will be displayed.
Usage
If 2FA is enabled, the sync apps such as DAVx must use this new app password instead of the web authentication password.
Nextcloud comes with a lot of plugins (it calls them "apps"), most Private Cyberspace installations will have the following plugins installed and enabled by default.
Activity
Analytics ++
Auditing / Logging
Bookmarks ++
Brute-force settings -
Calendar
Circles --
Client Push
Collaborative tags
Comments
Contacts
Contacts Interaction
Custom menu ++
Default encryption module -
Dashboard
Deck
External storage support +
Federation
File sharing
First run wizard
Forms ++
Full text search
Full text search - Elasticsearch Platform
Full text search - Files
LDAP user and group backend -
Log Reader
Monitoring
Music ++
Nextcloud All In One
Nextcloud announcements --
Nextcloud Office
NCDownloader ++
Notifications
Password policy
PDF viewer
PhoneTrack ++
Photos
Privacy
Recommendations
Related Resources
Right click
Share by mail
Snappymail ++
Support --
Suspicious Login -
Tables ++
Talk
Tasks
Text
Two-Factor TOTP Provider
Usage survey --
User status
Versions
Weather status --
Below documents what has been done to Nextcloud plugins listed above by default (when your Private Cyberspace is first created).
Those 36 without any suffix are enabled when installed.
Those 4 with - suffix are disabled already when installed and remain disabled.
Those 1 with + suffix are disabled when installed but are enabled after install.
Those 4 with -- are enabled when installed but are disabled after install.
Those 9 with ++ are added and enabled after install.
Feel free to suggest some more "must have" plugins to be added to the above list!
Some external software are added in the Data Node to complement Nextcloud.
1. Photoprism
Currently Photoprism is installed in the Data Node to provide an AI driven multimedia album for your Private Cyberspace.
The files on Photoprism are accessed from within Nextcloud under the photoprism directory using via the WebDAV external storage with the following setting by default:
Encryption - Disabled
Preview - Disabled
Sharing - Disabled
Check Changes - Once every direct access
Mac NFD - Disabled
Read Only - Disabled
Note the default processing delays in Photoprism:
PHOTOPRISM_AUTO_INDEX - default 5 minutes.
PHOTOPRISM_AUTO_IMPORT - default 3 minutes.
Further work:
turn off requirement for review in order to show image in main view (by default).
1.1. Alternative
The following Nextcloud Memories Plugin Set can be used instead of Photoprism to provide media album function.
You can type the following into the search input box:
word will try to find posts with that word
“exact phrases” will try to find the term inside the quote marks. This allows looking only for direct matches, such as "look at my cluckers" to find posts explicitly telling you to look at someone’s cluckers.
-exclude will exclude the term prepended by a minus sign. This allows filtering out certain terms, such as animals -cats to find posts about animals without posts about cats.
+include will include the term after the plus sign. This allows searching for multiple terms that must be included, such as cat +dog to find posts about both cats and dogs.
the search syntax is the same as the one used on the hub server.
Examples
test nextcloud help
will return all your files containing test OR nextcloud OR help in their path or content.
+test nextcloud help
will return all your files containing the exact word test and that might contains nextcloud OR help in their path or content.
For example, the file in the folder help/ that contains the string test the opensource project nextcloud or test anything or testing nextcloud but not testing anything.
+testing nextcloud -"testing nextcloud"
will return all your files containing the exact word “testing” and that might contains nextcloud but does not contains the exact string testing nextcloud
nextcloud -test
will return all your files containing nextcloud but does not contains words starting with test