Home Assistant

Currently, the Device Node is based on the Home Assistant software by default.

Device Node 24.07

Minimum versions

  1. Home Assistant 2023.10
  2. Frigate 0.13
  3. ESPHome 2023.10.0

Mobile App

1. Android App

The app can be downloaded from https://play.google.com/store/apps/details?id=io.homeassistant.companion.android

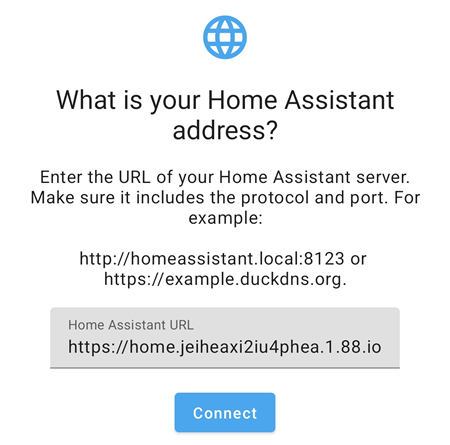
After the app has been installed, enter the Home Assistant Address and click on the Connect button. In the example below the address is https://home.jeiheaxi2iu4phea.1.88.io

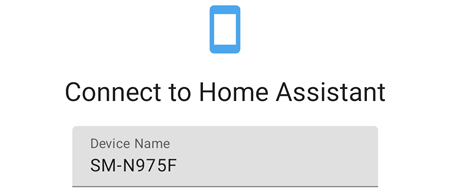
Enter the Username and Password. The device name will be displayed if the username and password are entered correctly. In the example below, the device name is called SM-N975F.

Turn on the Enable Location Tracking and other Permissions when prompted. Once completed. the following default screen will be displayed.

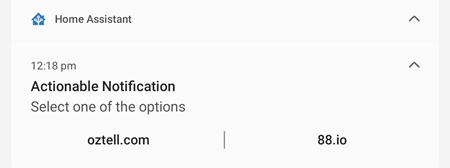
When there is a notification, it will be shown just like other notifications such as SMS or missed calls. In the example below, the notification is to select the oztell.com or 88.io web address.

Note: to see past notifications which have not been clicked, swipe from the top screen to the centre.

2. iOS App

The app can be downloaded from https://apps.apple.com/us/app/home-assistant/id1099568401

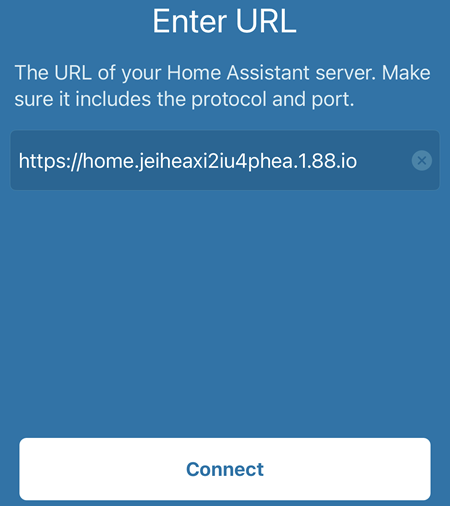
After the app has been installed, enter the Home Assistant Address and click on the Connect button. In the example below the address is https://home.jeiheaxi2iu4phea.1.88.io

Enter the Username and Password and allow all Notifications, Alerts and all Permissions when prompted. Once completed. the following default screen will be displayed.

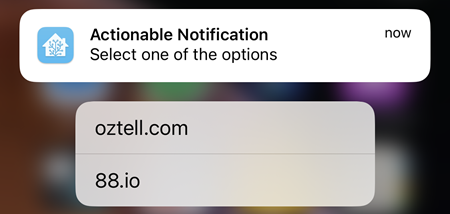
When there is a notification, it will be shown just like other notifications such as SMS or missed calls. Simply long press on notification to view it. In the example below, the notification is to select the oztell.com or 88.io web address.

Note: to see past notifications which have not been clicked, swipe from the top screen to the centre.

Web Site

You can login to Home Assistant web site.

1. ESPHome

In order to manage ESP devices using Home Assistant, the ESPHome add-on must first be installed.

On the Home Assistant page, go to Settings -> Add-ons -> ADD-ON STORE -> type ESPHome in the search field -> Install.

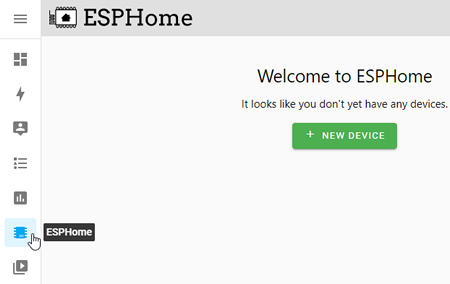
If it has been installed successfully, the ESPHome menu will be displayed as shown below.

esphome

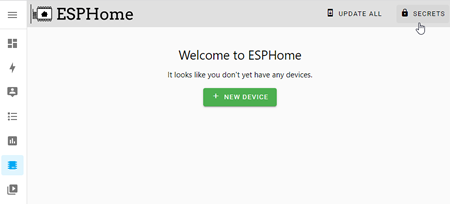
The next step is to configure the SECRETS which contains Your Wi-Fi SSID and password. Please note: the Home Assistant and the WiFi MUST be on the same network.

secrets

1.1. Adding ESP devices

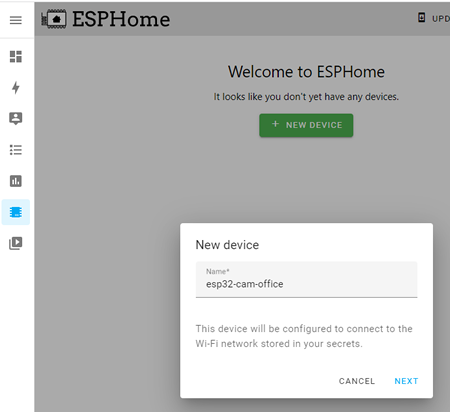
  1. Click on the green + NEW DEVICE button and give a name for the device. In the example below, the device is called esp32-cam-office and click on NEXT.

esp32-cam-office

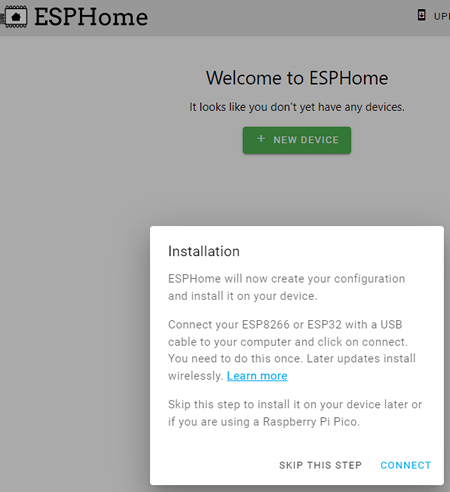
  1. Click on CONNECT to begin the installation.

connect

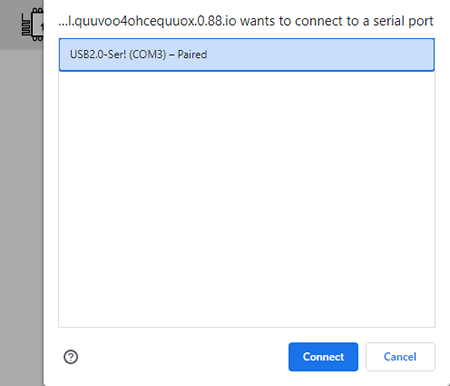
  1. The com port used by the ESP device will be displayed. In the example below COM3 is used by the ESP device. Click on the Connect button to continue.

com_port

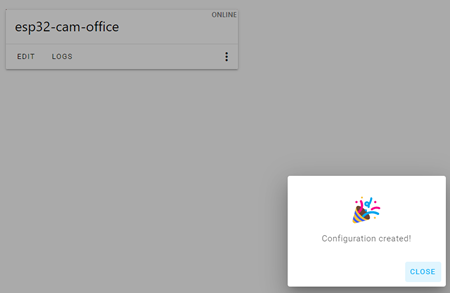
  1. The process will take a couple of minutes. The Configuration created window will be displayed once the installation is complete and the device status should be ONLINE.

conf_created

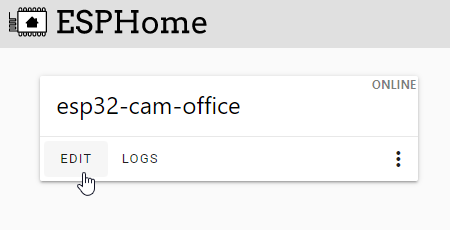
  1. Click on the Edit button and copy the Encryption key which will be needed in the next step.

device_edit

Now that the device has been discovered by ESPHome, the next step is to have Home Assistant configure the device.

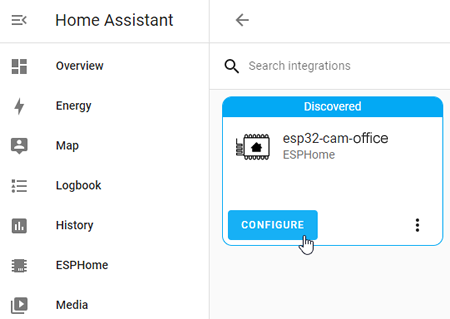
  1. Click on Settings -> Devices & Services -> Configure.

device_configure

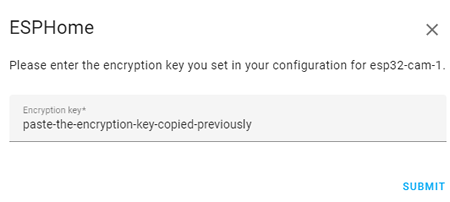
  1. Paste the encryption key and click on Submit.

encryp_key

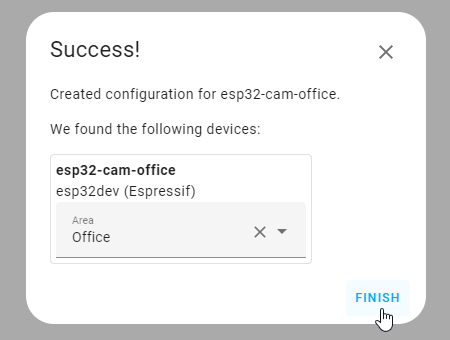
  1. Once completed, click on the Finish button.

conf_success

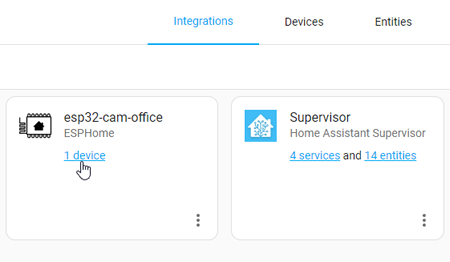
  1. The device is now managed by Home Assistant.

device_integrated

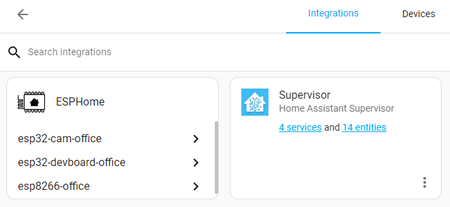
  1. If there are multiple devices, they will also be shown.

device_multiple

YAML

Globals

Prevent frequent update global variables:

esphome:
  name: ${device_name}
  platform: ESP8266
  board: esp01_1m
  on_boot:
    - logger.log:
        level: DEBUG
        format: 'Light ON time is set to %d'
        args: ['id(light_on_time)']

globals:
  - id: light_on_time
    type: int
    restore_value: true
    initial_value: '30'

sensor:
  - platform: homeassistant
    id: on_time
    entity_id: input_number.${device_name}
    on_value:
      then:
        if:
          condition:
            lambda: 'return id(light_on_time) != int(x);'
          then:
            - logger.log:
                level: DEBUG
                format: 'Light ON time changed from %d to %d seconds'
                args: ['id(light_on_time)', 'int(x)']
            - globals.set:
                id: light_on_time
                value: !lambda 'return int(x);'

1. User Interface Improvements

Tutorials:

2. Database Schema

sqlite>  SELECT sql FROM sqlite_master;
CREATE TABLE event_data (
        data_id INTEGER NOT NULL,
        hash BIGINT,
        shared_data TEXT,
        PRIMARY KEY (data_id)
)
CREATE TABLE state_attributes (
        attributes_id INTEGER NOT NULL,
        hash BIGINT,
        shared_attrs TEXT,
        PRIMARY KEY (attributes_id)
)
CREATE TABLE statistics_meta (
        id INTEGER NOT NULL,
        statistic_id VARCHAR(255),
        source VARCHAR(32),
        unit_of_measurement VARCHAR(255),
        has_mean BOOLEAN,
        has_sum BOOLEAN,
        name VARCHAR(255),
        PRIMARY KEY (id)
)
CREATE TABLE recorder_runs (
        run_id INTEGER NOT NULL,
        start DATETIME,
        "end" DATETIME,
        closed_incorrect BOOLEAN,
        created DATETIME,
        PRIMARY KEY (run_id)
)
CREATE TABLE schema_changes (
        change_id INTEGER NOT NULL,
        schema_version INTEGER,
        changed DATETIME,
        PRIMARY KEY (change_id)
)
CREATE TABLE statistics_runs (
        run_id INTEGER NOT NULL,
        start DATETIME,
        PRIMARY KEY (run_id)
)
CREATE TABLE events (
        event_id INTEGER NOT NULL,
        event_type VARCHAR(64),
        event_data TEXT,
        origin VARCHAR(32),
        origin_idx SMALLINT,
        time_fired DATETIME,
        context_id VARCHAR(36),
        context_user_id VARCHAR(36),
        context_parent_id VARCHAR(36),
        data_id INTEGER, time_fired_ts FLOAT,
        PRIMARY KEY (event_id),
        FOREIGN KEY(data_id) REFERENCES event_data (data_id)
)
CREATE TABLE statistics (
        id INTEGER NOT NULL,
        created DATETIME,
        start DATETIME,
        mean FLOAT,
        min FLOAT,
        max FLOAT,
        last_reset DATETIME,
        state FLOAT,
        sum FLOAT,
        metadata_id INTEGER, created_ts FLOAT, start_ts FLOAT, last_reset_ts FLOAT,
        PRIMARY KEY (id),
        FOREIGN KEY(metadata_id) REFERENCES statistics_meta (id) ON DELETE CASCADE
)
CREATE TABLE statistics_short_term (
        id INTEGER NOT NULL,
        created DATETIME,
        start DATETIME,
        mean FLOAT,
        min FLOAT,
        max FLOAT,
        last_reset DATETIME,
        state FLOAT,
        sum FLOAT,
        metadata_id INTEGER, created_ts FLOAT, start_ts FLOAT, last_reset_ts FLOAT,
        PRIMARY KEY (id),
        FOREIGN KEY(metadata_id) REFERENCES statistics_meta (id) ON DELETE CASCADE
)
CREATE TABLE states (
        state_id INTEGER NOT NULL,
        entity_id VARCHAR(255),
        state VARCHAR(255),
        attributes TEXT,
        event_id INTEGER,
        last_changed DATETIME,
        last_updated DATETIME,
        old_state_id INTEGER,
        attributes_id INTEGER,
        context_id VARCHAR(36),
        context_user_id VARCHAR(36),
        context_parent_id VARCHAR(36),
        origin_idx SMALLINT, last_updated_ts FLOAT, last_changed_ts FLOAT,
        PRIMARY KEY (state_id),
        FOREIGN KEY(event_id) REFERENCES events (event_id) ON DELETE CASCADE,
        FOREIGN KEY(old_state_id) REFERENCES states (state_id),
        FOREIGN KEY(attributes_id) REFERENCES state_attributes (attributes_id)
)
CREATE INDEX ix_event_data_hash ON event_data (hash)
CREATE INDEX ix_state_attributes_hash ON state_attributes (hash)
CREATE UNIQUE INDEX ix_statistics_meta_statistic_id ON statistics_meta (statistic_id)
CREATE INDEX ix_recorder_runs_start_end ON recorder_runs (start, "end")
CREATE INDEX ix_statistics_runs_start ON statistics_runs (start)
CREATE INDEX ix_events_context_id ON events (context_id)
CREATE INDEX ix_events_data_id ON events (data_id)
CREATE INDEX ix_statistics_metadata_id ON statistics (metadata_id)
CREATE INDEX ix_statistics_short_term_metadata_id ON statistics_short_term (metadata_id)
CREATE INDEX ix_states_context_id ON states (context_id)
CREATE INDEX ix_states_attributes_id ON states (attributes_id)
CREATE INDEX ix_states_old_state_id ON states (old_state_id)
CREATE INDEX ix_states_event_id ON states (event_id)
CREATE INDEX ix_events_time_fired_ts ON events (time_fired_ts)
CREATE INDEX ix_events_event_type_time_fired_ts ON events (event_type, time_fired_ts)
CREATE INDEX ix_states_entity_id_last_updated_ts ON states (entity_id, last_updated_ts)
CREATE INDEX ix_states_last_updated_ts ON states (last_updated_ts)
CREATE INDEX ix_statistics_start_ts ON statistics (start_ts)
CREATE UNIQUE INDEX ix_statistics_statistic_id_start_ts ON statistics (metadata_id, start_ts)
CREATE INDEX ix_statistics_short_term_start_ts ON statistics_short_term (start_ts)
CREATE UNIQUE INDEX ix_statistics_short_term_statistic_id_start_ts ON statistics_short_term (metadata_id, start_ts)

3. Reference
Tips

Mount SMB

Backup

Beacon Monitor

Android

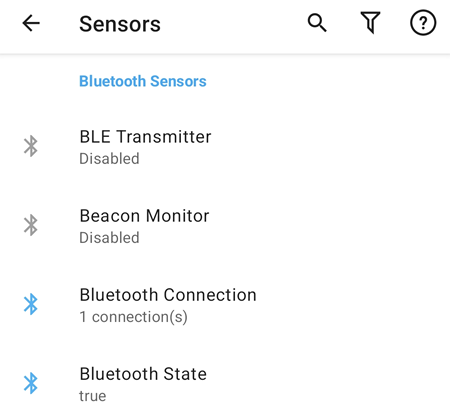
In the example below, the device used is a Samsung Galaxy Note (SM-N975F) running Android 12. In the Home Assistant app, go to Settings -> Companion App -> Manage Sensors and enable the Beacon Monitor sensor. If prompted, please allow all permissions.

android_bluetooth_sensors

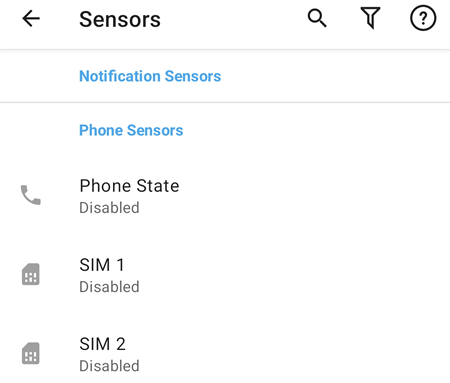
The next step is to enable Phone State, SIM 1 and SIM 2 under the Phone Sensors. If prompted, please allow all permissions.

android_phone_sensors

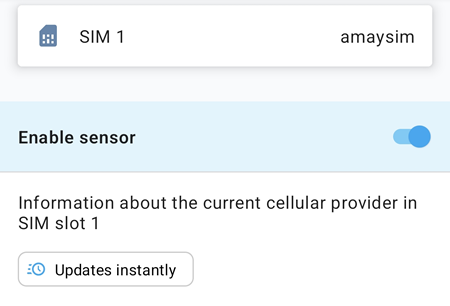
After all Phone Sensors have been enabled, go to SIM 1 and SIM 2 (if used) and click on the Updates instantly button.

android_sim_update

The Updates instantly button is to update the sensor values to the Home Assistant server. To send the sensor values to the MQTT server, on Home Assistant, click on on Settings -> Automations & Scenes -> click on the 3-buttonbutton next to the mobile device -> Run.

For the sensor values to be displayed on Home Assistant, click on on Settings -> Automations & Scenes -> click on the 3-button button next to the mobile device -> Traces. In the example below, device SM-N975F detects 9 ibeacons with 9 different UUIDs (under beacon_monitor) in the format of UUID, Major, Minor and Distance (in metres)

Executed: 13 April 2023 at 16:16:26
Result:
params:
 domain: mqtt
 service: publish
 service_data:
   qos: 0
   retain: true
   topic: homeassistant/device/sm_n975f/states/attributes
   payload:
     os: Android
     friendly_name: SM-N975F
     latitude: '-33.8797309'
     longitude: '151.204774'
     altitude: '40'
     gps_accuracy: '14'
     course: '12'
     speed: '0'
     vertical_accuracy: '1'
     battery_level: '72'
     battery_state: discharging
     bluetooth_connection: '1'
     bluetooth_state: 'on'
     wifi_bssid: 36:18:d6:ad:89:0e
     activity: still
     sim1_carrier: amaysim
     sim2_carrier: ''
     beacon_monitor: >-
       {'10dc67ef-63cb-5ec9-b6a1-05ee8dd7a802_81_80': 0.53,
       '13970c53-671d-5d75-bbd3-0c03173414eb_51_50': 1.71,
       '1850bf2b-b39d-5cc4-8b11-07fcff31aad7_61_60': 0.98,
       '20f8bc47-79b5-567e-a0f7-61629bea5b12_10167_61958': 1.43,
       '9947140c-4b4e-59e1-bb25-afe3b4f57b67_6_5': 0.54,
       'b0d4e828-cd36-5951-bba7-03f2504d527d_4_3': 0.41,
       'bbcd9999-1396-5979-a872-0ff613a4b798_91_90': 0.09,
       'fa2ef809-42f3-5549-a614-09d5c4ebd61f_11_10': 0.26,
       'fa5de1f8-4506-550a-a7a1-288e9c8f7ddf_71_70': 0.01, 'icon':
       'mdi:bluetooth', 'friendly_name': 'SM-N975F Beacon Monitor'}
     ts: '1681366586'
 target: {}
running_script: false
limit: 10

The same result is also displayed on the MQTT Explorer Web UI under homeassistant -> device -> sm_n975f -> states -> attributes.

iOS

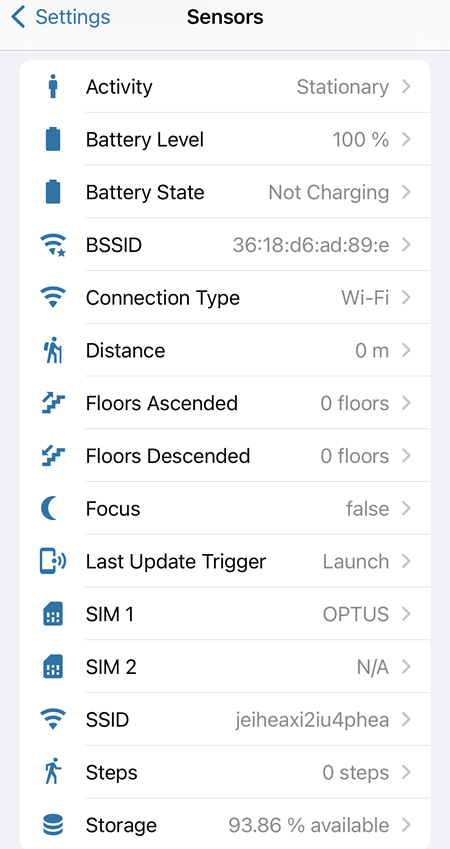
In the example below, the device used is an iPhone Xs running iOS 16.4.1. In the Home Assistant app, the Beacon Monitor sensor is not available.

ios_sensors

Home Assistant Resources

Windows Client:

Integration

Home Assistant Integrations enable you to customise your Device Node for your environment.

Some recommended Integrations:

  1. ESPHome
  2. Home Assistant Community Store
  3. Home Assistant Supervisor
  4. iBeacon Tracker
  5. Mobile App
  6. MQTT
  7. OwnTracks
  8. Voice over IP
  9. Wyoming Protocol
  10. Radio Browser
  11. Sun
  12. CalDav
  13. Browser Mod

Home Assistant Add-ons

Home Assistant Add-ons are docker containers which can be added to your Device Node to increase its features.

Some recommended Add-ons:

  1. GitHub - Sebclem/hassio-nextcloud-backup: Hass.io Add-on: Backup your snapshots to Nextcloud
  2. addons/samba at master · home-assistant/addons · GitHub

Recorder

1. Frigate

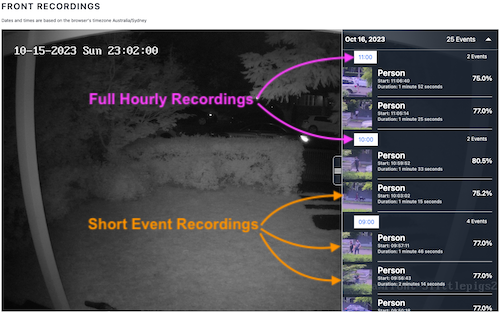
By leveraging the frigate software, it is possible to provide both continuous recording as well as event based recording.

Event based recording takes advantage of AI technologies to detect objects in the video in real time.

recorder

2. Neural Camera

3. Demonstration

Live AI Video Detection using Frigate

https://vm-879204.sydney.aunsw.88.io/

Programming