Introduction
This page is about setting up Apple iOS phones.
For more comprehensive support please visit the Support page.
A list of posts about using Apple iOS is available HERE.
iOS Safari
Personal Map and associated programs runs inside the iOS Safari browser.
app.contacttrace.com.au
app.contacttrace.com.au needs Location access to function fully (but basic features like QR code scan and Touch pins will still work without location access).
Allow LOCATION Access in Safari - 54 seconds video
Allow LOCATION Access in Safari - Step by Step
-
When running app.contacttrace.com.au for the first time, there will be a pop-up window saying "The website app.contacttrace.com.au would like to use your current location" Select "Allow" [show image].
-
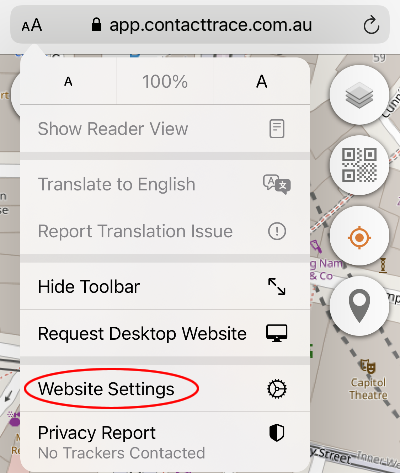
On the address bar, tap on the Aa icon and select "Website Settings". Then select "Location" [show image] and set to "Allow" [show image]
-
If Location Services is NOT working, check Privacy by going to the iOS "Settings" app and select "Privacy". Then select "Location Services" [show image]. Scroll down and select "Safari Websites" [show image] and set "Allow Location Access" to "While Using the App" [show image].
-
If Location Services is NOT working, check Safari by going to the iOS "Settings" app and select "Safari". Then select "Location" [show image] and confirm that "app.contacttrace.com.au" is Allowed [show image].
Some Safari and iOS combinations will pop-up an error when you try to get geolocation from Safari while your are OFFLINE - as in NO internet connection.
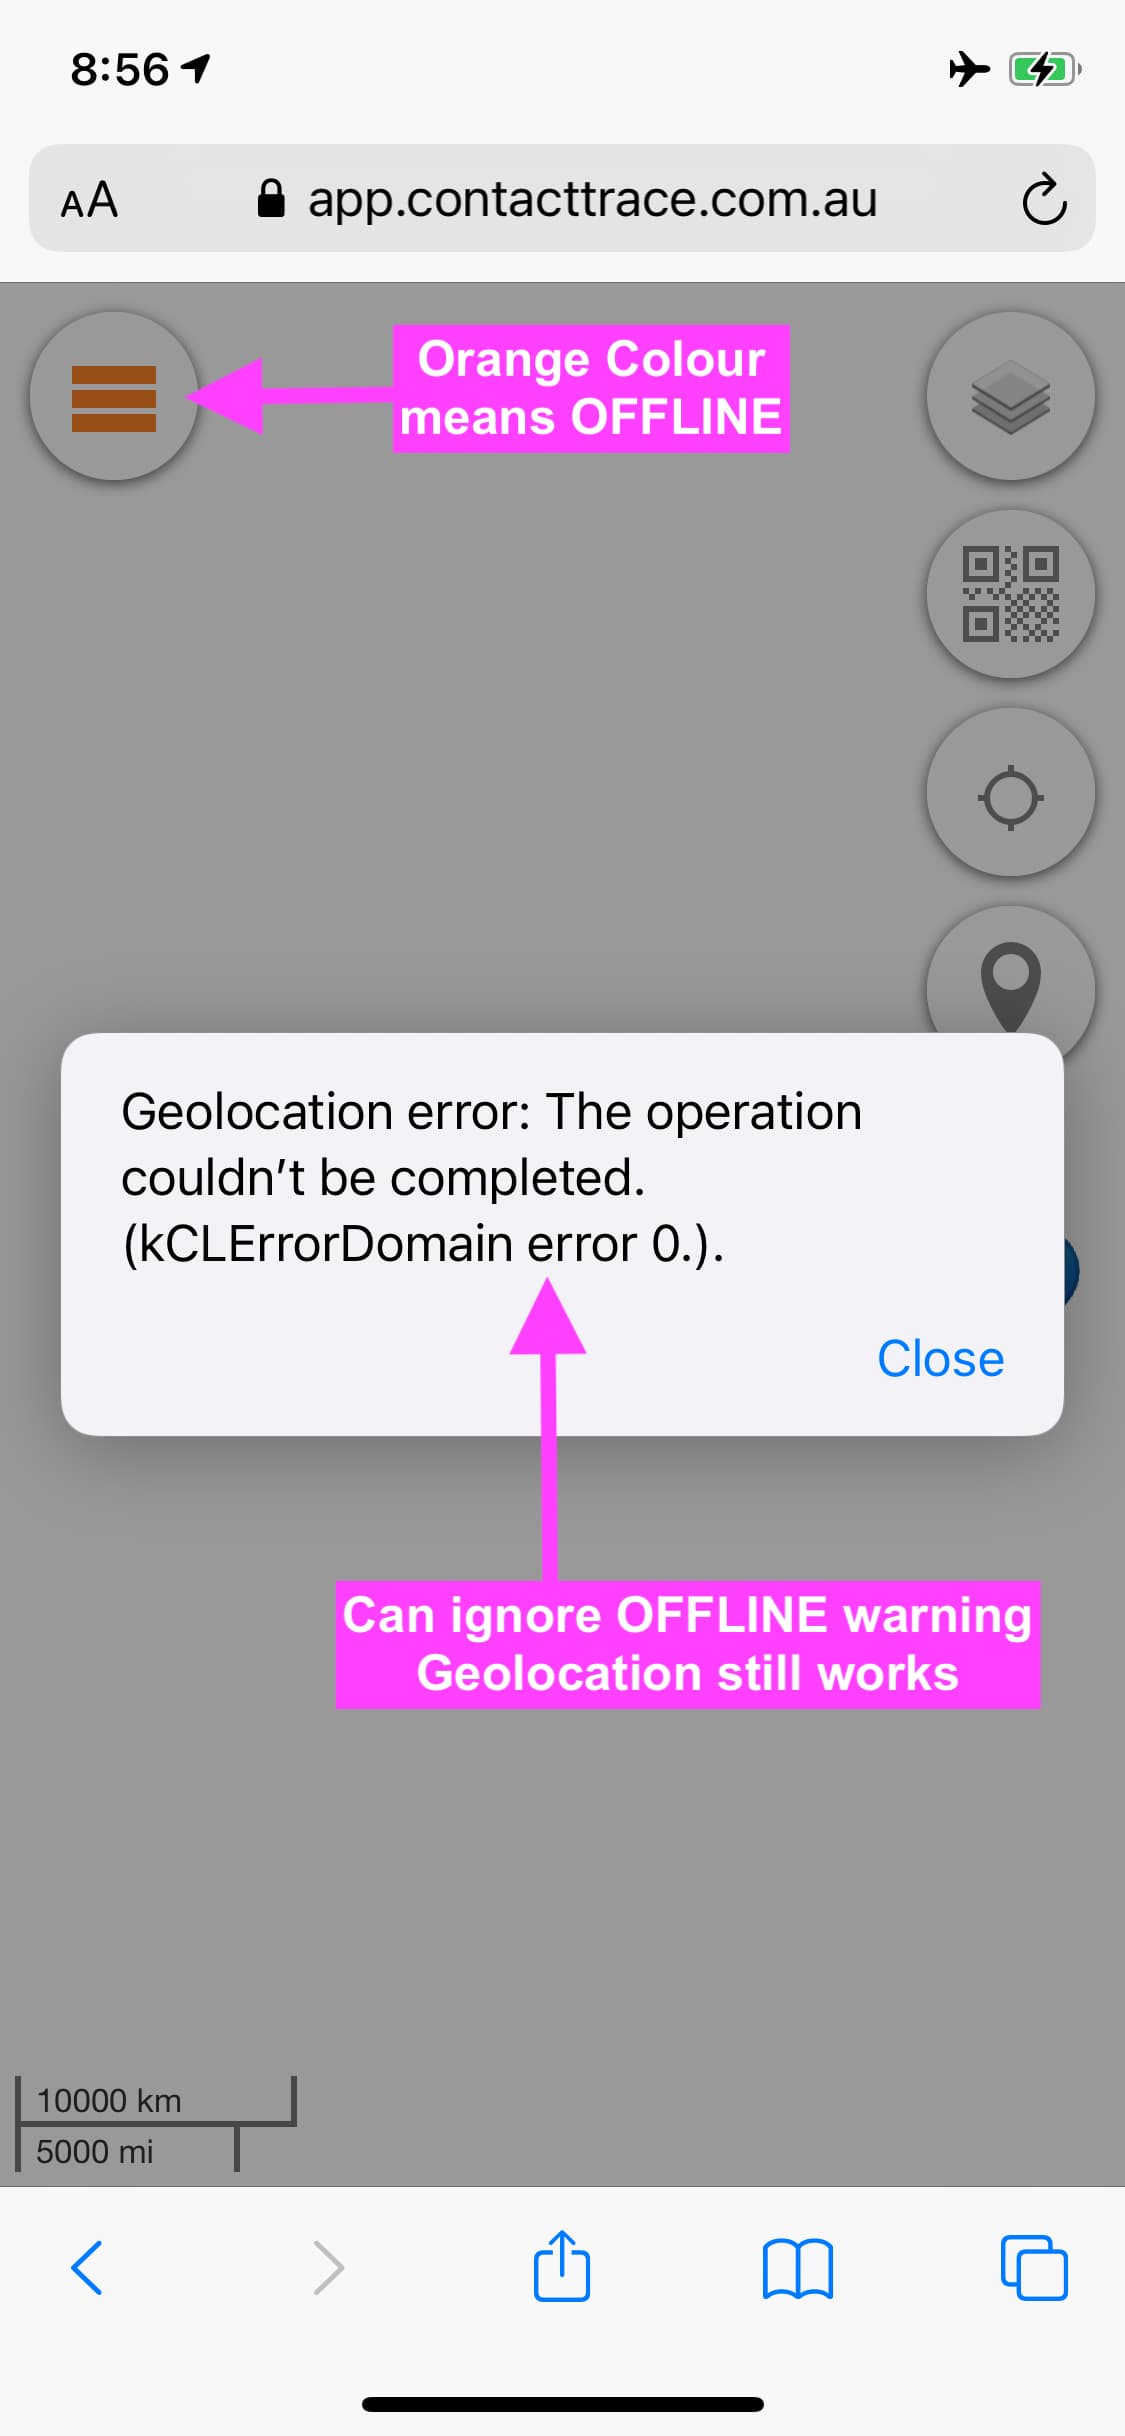
That is just a warning that it cannot use the network to get geolocation data.
It will still use other methods to get geolocation data, so you can ignore that pop-up error.
qrscan.contacttrace.com.au
qrscan.contacttrace.com.au needs Camera access to function.
Allow CAMERA Access in Safari - 45 seconds video
Allow CAMERA Access in Safari - Step by Step
app.contacttrace.com.au will run qrscan.contacttrace.com.au when QR Code scanning is required.
-
When running qrscan.contacttrace.com.au for the first time, there will be a pop-up window saying "qrscan.contacttrace.com.au Would Like to Access the Camera", Select "Allow" [show image]. If qrscan pop-up window appears more than once, simply Select "Allow".
-
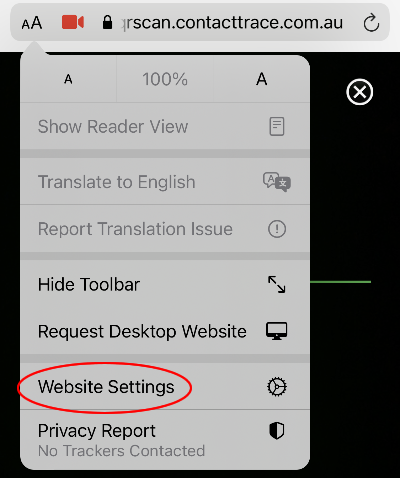
On the address bar, tap on the Aa icon and select "Website Settings". Then select "Camera" [show image] and change to "Allow" [show image]
-
If Camera is NOT working, check Safari by going to the iOS "Settings" app and select "Safari". Then select "Camera" [show image] and confirm that "qrscan.contacttrace.com.au" is Allowed [show image]
map.contacttrace.com.au
map.contacttrace.com.au needs Location access to function fully (but basic features like browsing locations will still work without location access).
Allow LOCATION Access in Safari - 34 seconds video
The Map is available from https://app.contacttrace.com.au under the "Main" menu [show image].
When using the Map for the first time, a pop-up window will appear [show image], Select "Allow".
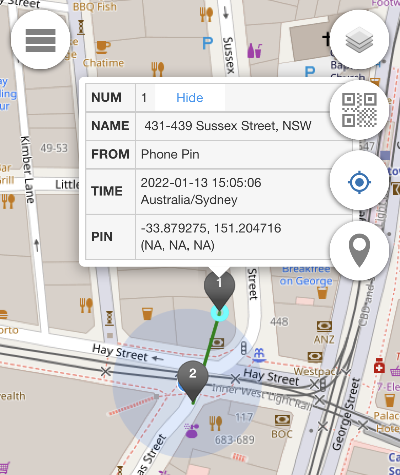
To change to a different "Map View", click on the button on the top right hand corner [show image]. To do a "Category Search", click on the "Magnifying Glass" icon [show image]
Open GPX Tracker
Personal Map supports importing data from ANY iOS mobile app that exports GPX, KML, GeoJSON. You can find some examples on the discussion forum
However, Open GPX Tracker the currently recommended iOS Mobile App for Phone logging.
For more details Open GPX Tracker please visit:
https://discuss.contacttrace.com.au/t/open-gpx-tracker-mobile-app/234
Set Up
Video below shows the setting up of iOS phone (including downloading the iOS mobile app):
- Tapping "Download Mobile App" button on iOS will bring you to Open GPX Tracker on Apple App Store.
- Follow the prompts to install it, see iOS video above for details.
- Once the installation has been completed, set the "Allow Location Access" to "Always".
- Click on the green "Start Tracking" button at the bottom of the screen to start logging.
Import Data
How to import pins
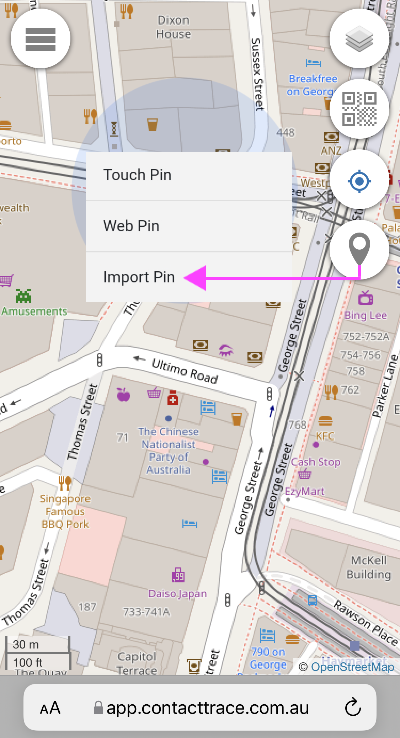
a. Click on the fourth button on the right and select "Import Pin".
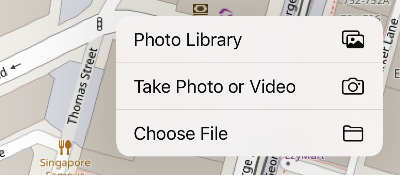
b. Select "Choose File"
c. Browse to /On My iPhone/GPX Tracker/
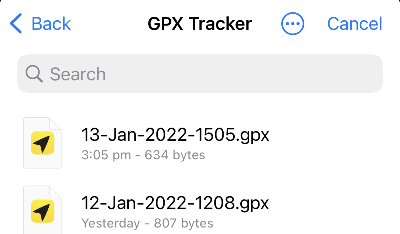
d. If the import is successful, one or more grey pins will be on the map.
Export Data
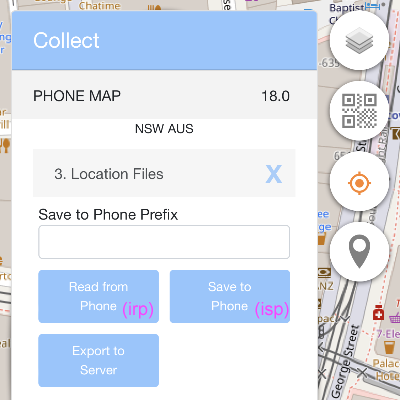
Go to PHONE MAP -> 3. Location Files
To save the pins to a .gpx file, a minimum of 2 pins is required. Select the "Save to Phone" (isp) button and there will be an option to encrypt the file.
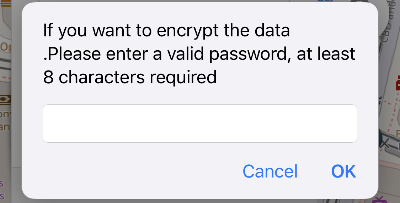
Tap on "Cancel" to save without encryption.
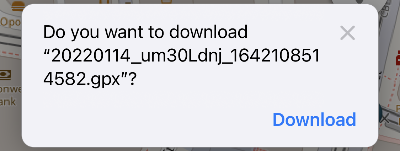
To import the .gpx file stored in the phone, select the "Read from Phone" (irp) button and select "Choose File" from the pop-up window and go to the "Downloads" folder which is the default storage location for iOS iPhones.
Traccar iOS Client
iOS Source Code:
iOS Download:
Server Logging send your location to a server instead of storing it on a phone.
Traccar Client App can be used to log your movement in real-time to the Fiduciary Exchange. Other apps may work if they also use the osmand format).
iOS Traccar App Installation (1 minute 41 seconds long)
The Traccar iOS App can be downloaded from https://app.contacttrace.com.au under the "Location" menu [show image] and "Traccar App" [show image]
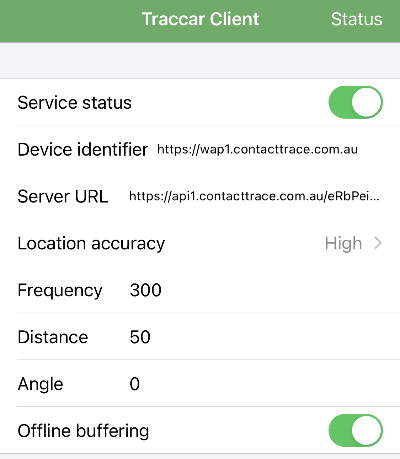
Once installed, please configure Traccar [show image]. For more details about the "Server URL" please visit https://web.contacttrace.com.au/personal-map/
After putting all the correct values, change the Service Status to ON. A pop-up window will appear [show image], Select "Allow While Using App".
Tap on Status on the top right hand corner. If you see "Location Update" [show image], that means the Traccar Client has been configured correctly.
Custom Ringtone
Custom Ringtone notification is available only to Guest Aliases (Share) and Member Aliases (Change).
Available "Send Phone" numbers:
61282050080
61282050081
61282050082
61282050083
61282050084
61282050085
61282050086
61282050087
61282050088
61282050089
61282050090
61282050091
61282050092
61282050093
61282050094
61282050095
61282050096
61282050097
61282050098
61282050099
SET UP
Go to ALIAS -> 4.Notification -> Ringtone.
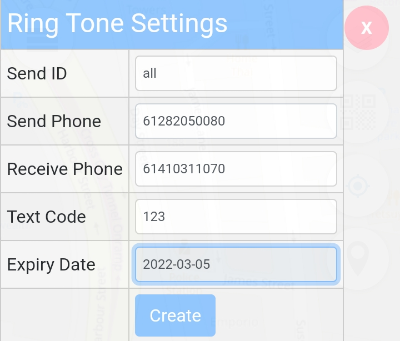
Send Phone = the Caller ID (DNIS number) displayed on the receiving mobile phone
Receive Phone = the receiving mobile phone number
Text Code = the unique digits used by senders to ring you
Expiry Date = ringtone will no longer active after this date
If the ringtone has been created successfully, it will be shown as below.

ADD THE SEND PHONE NUMBER TO THE MOBILE'S ADDRESS BOOK
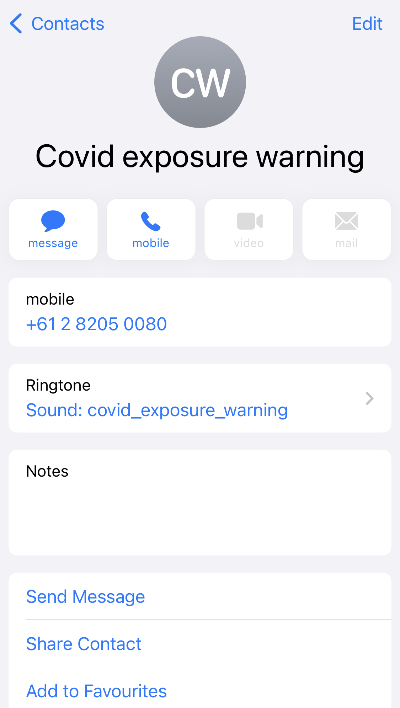
Example:
Name: Covid Exposure Warning
Mobile: +61 2 8205 0080
Ringtone: covid_exposure_warning
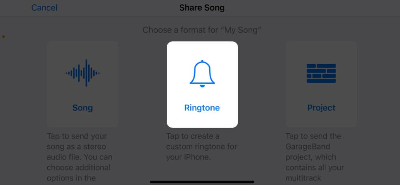
When there is an incoming call from +61 2 8205 0080 number, the covid_exposure_warning ringtone will be played. With iOS devices, all the ringtones from the phone can be used, however external ringtones or audio files, such as .mp3 will need to be converted first using GarageBand for iOS and then imported to the phone's ringtone.
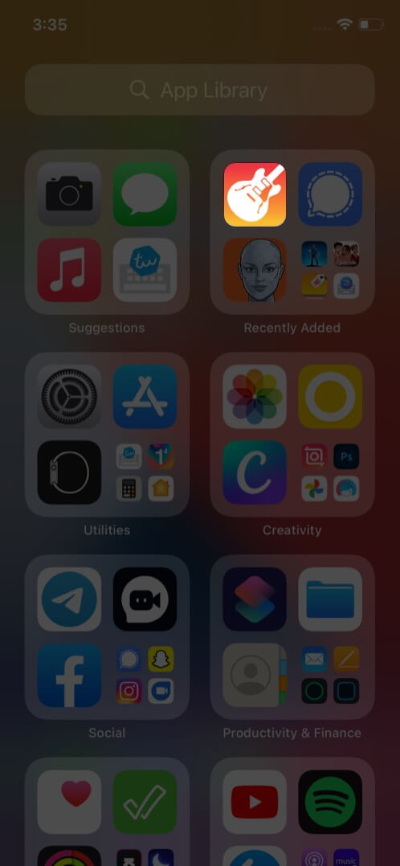
How to create a custom ringtone on iPhone (without a computer)
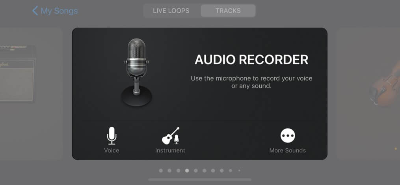
a. Launch the GarageBand app on your iPhone.
b. Swipe and find Audio Recorder from the options, tap Voice (mic icon).
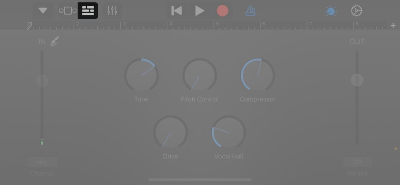
c. Here, tap View (brick wall like icon) to enter the editing section.
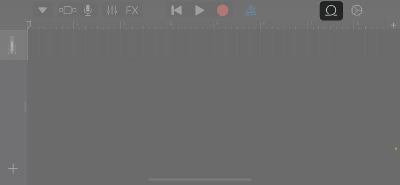
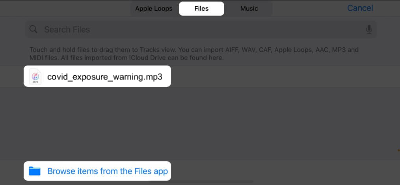
d. Tap the Loop icon; you’ll see three subheadings here – Apple Loops, Files, and Music. Browse to where the ringtone is located, e.g: Files.
e. Browse for the file to be used; hold it for a few seconds to import.
f. Now, select the down arrow icon from the top-left corner and tap My Songs .

g. Tap and hold the file and select Share from the list. Select Ringtone, then continue, name the file as per your choice, and tap Export
![[show image]](https://web.contacttrace.com.au/wp-content/uploads/2020/11/ios_device_location_small.png)
![[show image]](https://web.contacttrace.com.au/wp-content/uploads/2021/01/ios_websitesettings_location.png)
![[show image]](https://web.contacttrace.com.au/wp-content/uploads/2021/01/ios_websitesettings_location_allow.png)
![[show image]](https://web.contacttrace.com.au/wp-content/uploads/2020/08/ios_privacy_location_small.png)
![[show image]](https://web.contacttrace.com.au/wp-content/uploads/2020/08/ios_privacy_safari_small.png)
![[show image]](https://web.contacttrace.com.au/wp-content/uploads/2020/08/ios_privacy_while_using_app_small.png)
![[show image]](https://web.contacttrace.com.au/wp-content/uploads/2020/08/ios_safari_location_small.png)
![[show image]](https://web.contacttrace.com.au/wp-content/uploads/2021/01/ios_settings_safari_location.png)
![[show image]](https://web.contacttrace.com.au/wp-content/uploads/2021/01/ios_qrscan_camera.png)
![[show image]](https://web.contacttrace.com.au/wp-content/uploads/2021/01/ios_qrscan_websitesettings_camera.png)
![[show image]](https://web.contacttrace.com.au/wp-content/uploads/2021/01/ios_qrscan_websitesettings_camera_allow.png)
![[show image]](https://web.contacttrace.com.au/wp-content/uploads/2021/01/ios_safari_camera.png)
![[show image]](https://web.contacttrace.com.au/wp-content/uploads/2021/01/ios_safari_camera_allow.png)
![[show image]](https://web.contacttrace.com.au/wp-content/uploads/2021/01/ios_map.png)
![[show image]](https://web.contacttrace.com.au/wp-content/uploads/2021/01/ios_map_popup.png)
![[show image]](https://web.contacttrace.com.au/wp-content/uploads/2021/05/map_types.png)
![[show image]](https://web.contacttrace.com.au/wp-content/uploads/2021/01/map_category_search.png)
![[show image]](https://web.contacttrace.com.au/wp-content/uploads/2021/01/location_menu.png)
![[show image]](https://web.contacttrace.com.au/wp-content/uploads/2021/01/traccar_app.png)
![[show image]](https://web.contacttrace.com.au/wp-content/uploads/2021/01/ios_traccar_settings.png)
![[show image]](https://web.contacttrace.com.au/wp-content/uploads/2021/01/ios_traccar_popup.png)
![[show image]](https://web.contacttrace.com.au/wp-content/uploads/2021/01/ios_traccar_status.png)