Venue
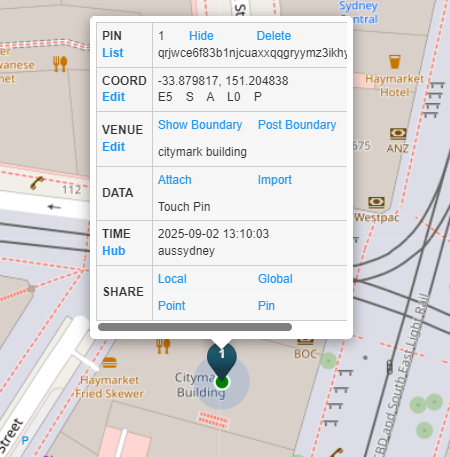
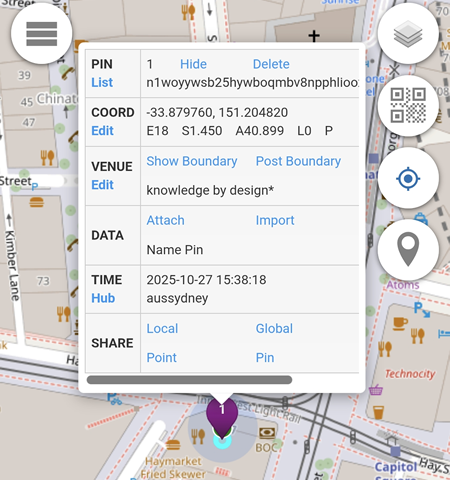
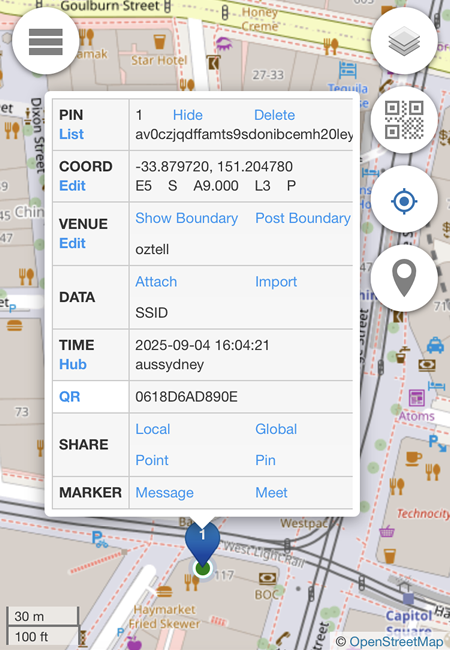
Location Pin -> Edit (Venue)
Existing Building
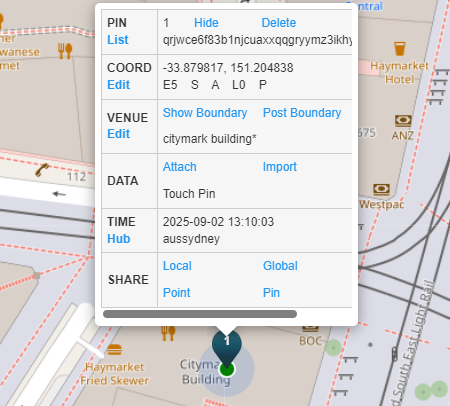
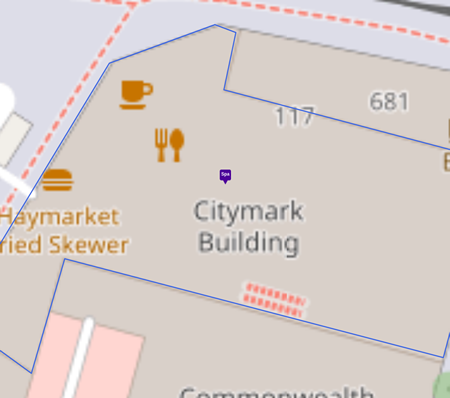
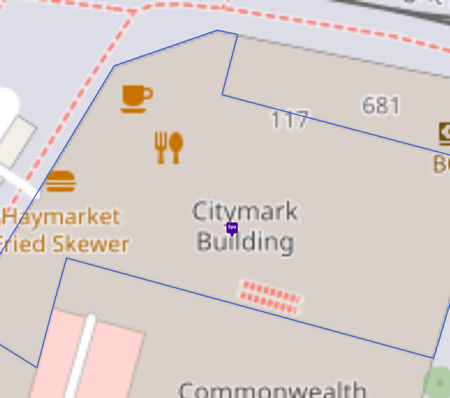
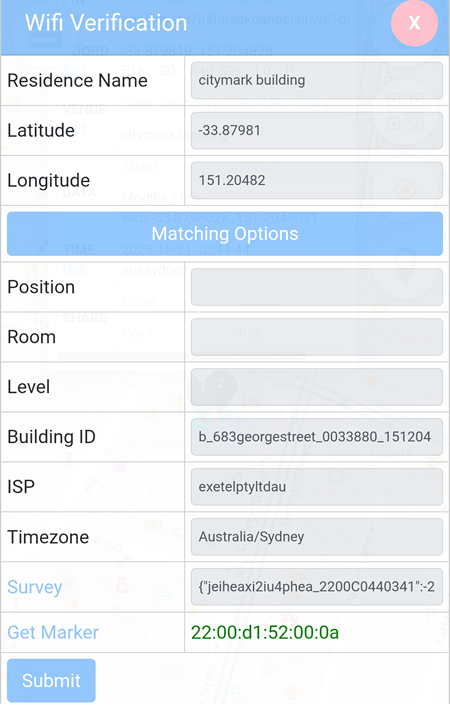
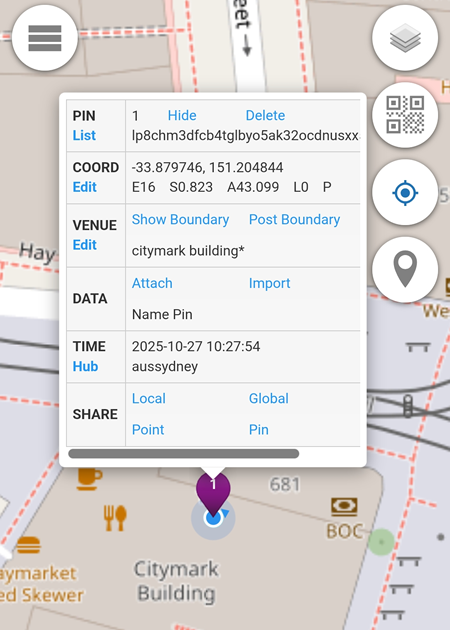
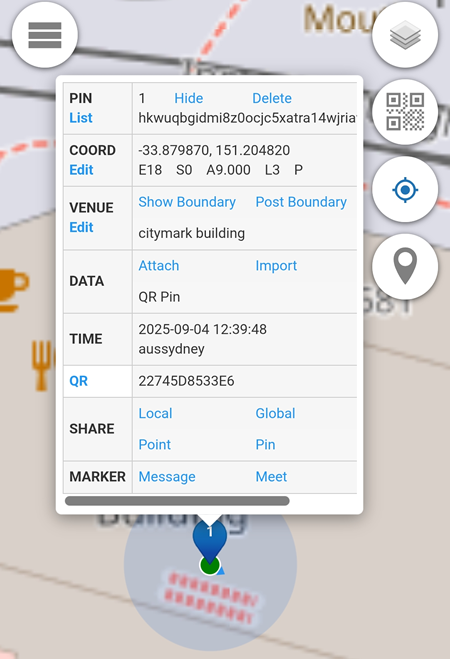
If a venue is already listed on OpenStreetMap and its coordinates closely match the selected latitude and longitude, the venue name will be automatically detected and displayed.
In the example below, the venue name Citymark Building is automatically retrieved and inserted.
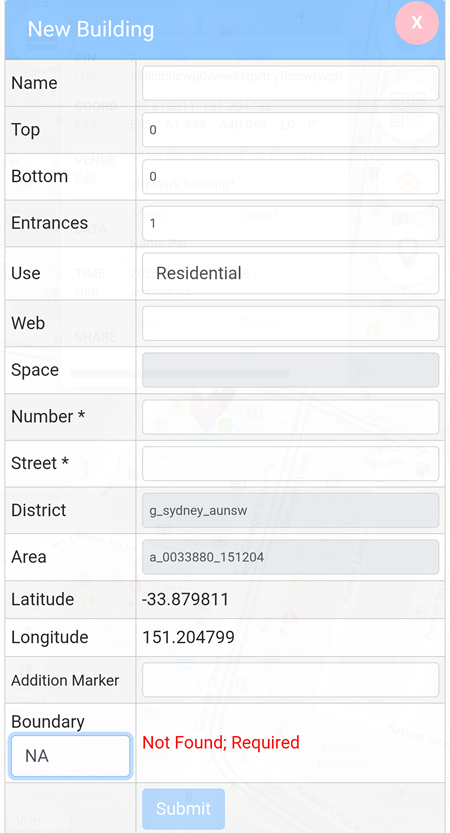
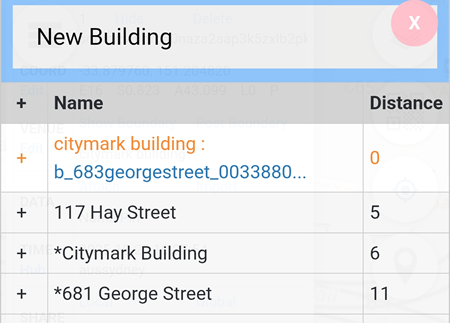
New Building
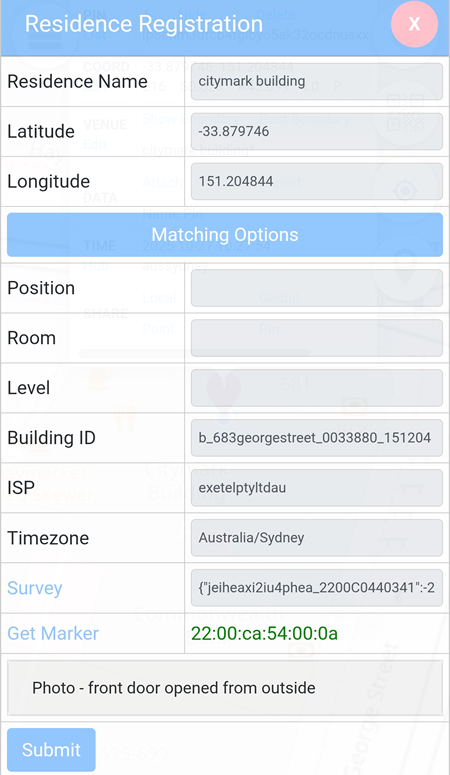
To add a new building, click the  button and complete the required fields.
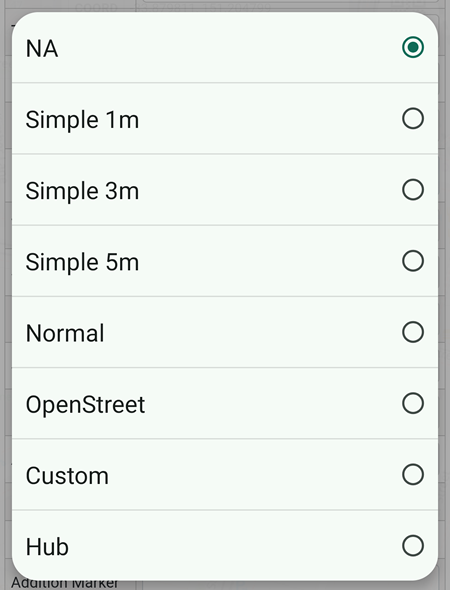
If the boundary is not defined (as shown in the image above), click the NA field and select one of the available options.
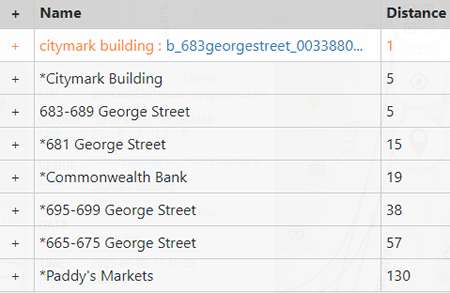
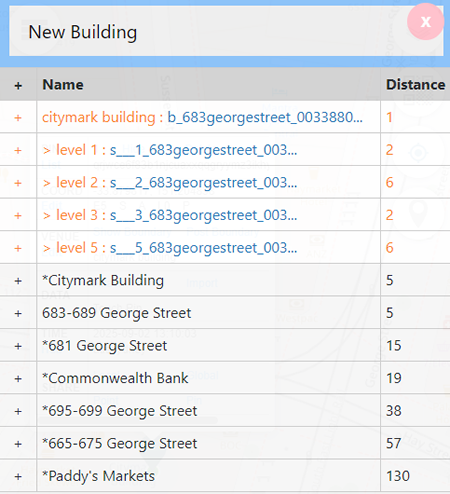
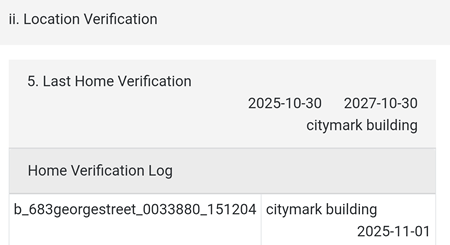
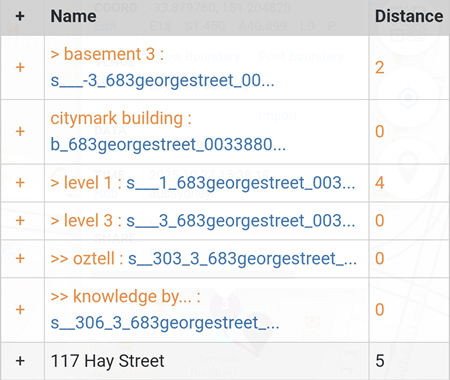
Once a new building has been added by the user, it will appear in the venue list highlighted in orange text.
By adding a building, additional venues within that building can be created by clicking the  icon next to the newly added building.
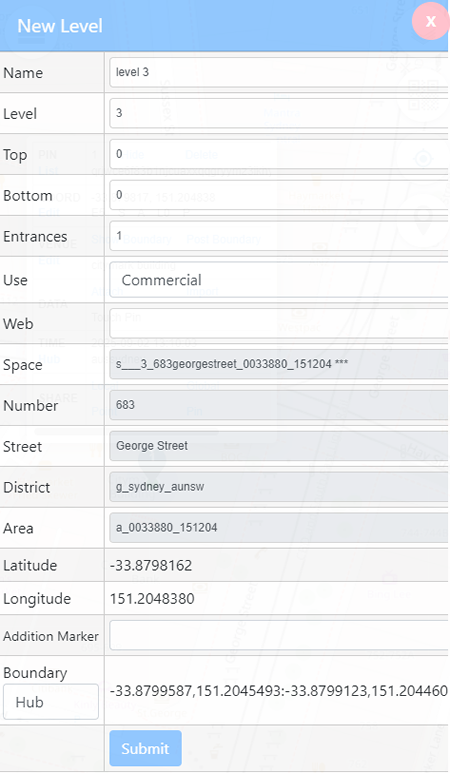
In the example below, a new level (floor) has been added within the building.
Once added, the new level (floor) will appear in the list, highlighted in orange text.
Rooms on the level can also be created by clicking the icon next to the level name.
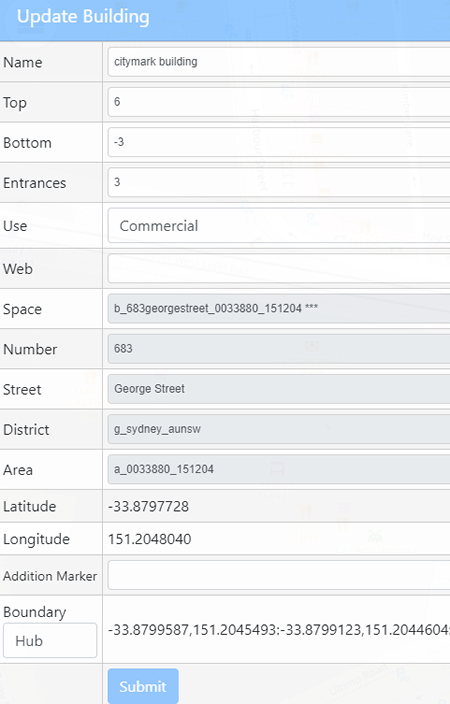
The added building/level/room can be edited by clicking on the blue text.
In the Building example below:
- Top = 6 → The top floor of the building is Level 6.
- Bottom = -3 → The lowest floor of the building is Basement 3.
- Entrances = 3 → The building has 3 separate entrances.
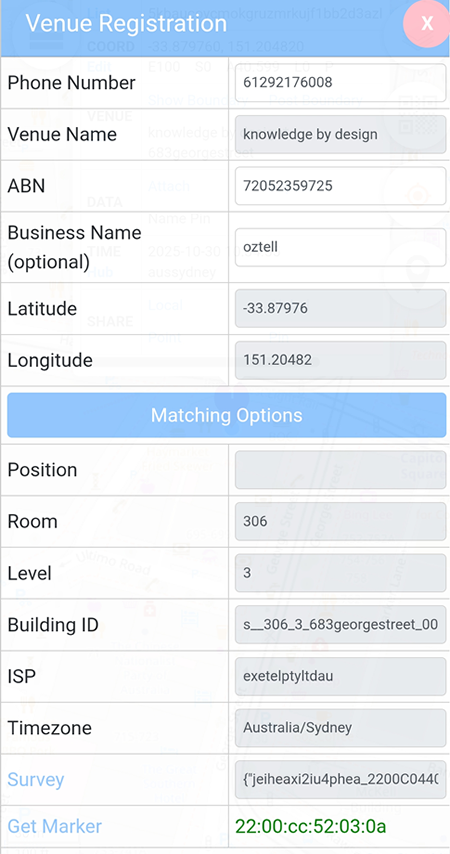
Using the Newly Added Building, Floor, or Room
- Click on the building, floor, or room name displayed in blue text.
- Click Submit.
- If the action is successful, a * will appear at the end of the venue name.
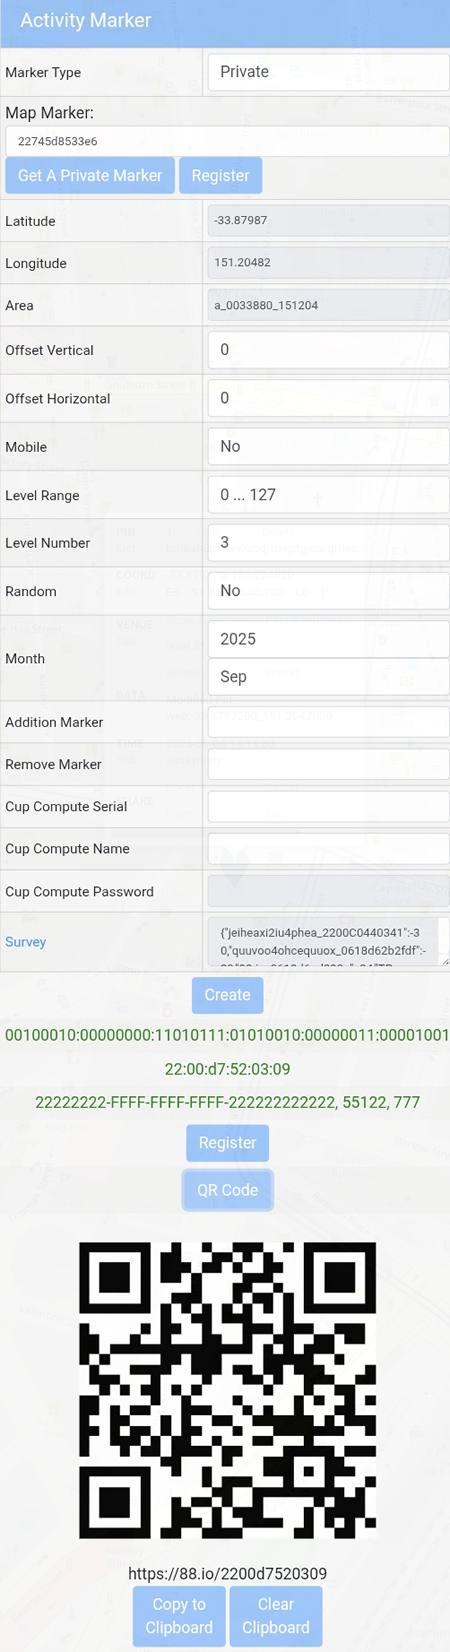
Post Boundary
Requirements::
- Venue name
- Multiple touch pins
If the message “no defined way pts” is displayed, it means the boundary has not been created yet.
To create the boundary:
- Click Attach → Boundary.
- Select the touch pins.
- Click Draw.
- Click Store Image.
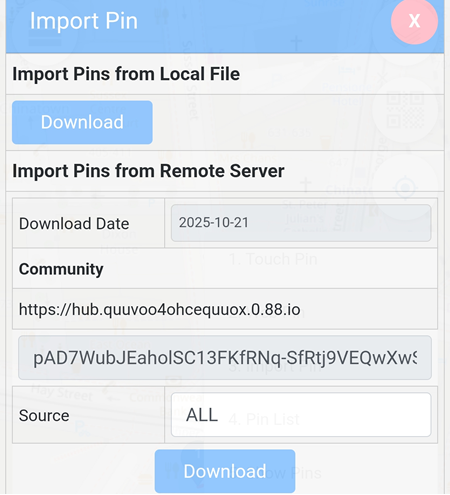
If Publish Pins are selected, clicking on Post Boundary will create a post on https://hub.aunsw.88.io and https://hub.quuvoo4ohcequuox.0.88.io with the selected boundary displayed on the Venue page.
Example:
Simple 1m boundary
Simple 3m boundary
Simple 5m boundary
Normal boundary
Boundary Not Found
If the “not found” message appears in the boundary field on the Venue page, it means that particular boundary cannot be used.
In the example below, the Openstreet map boundary can not be used.

Venue - Boundary
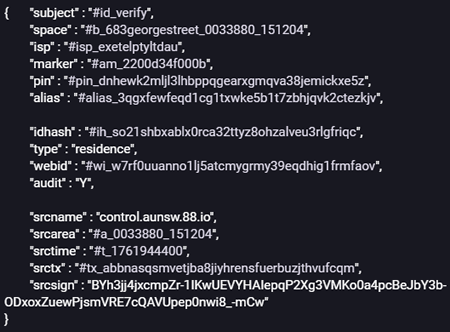
When Hub is selected for the boundary on the Venue page, the system will use the boundary details posted on the https://hub.aunsw.88.io for that location.

Example:
{	"subject" : "#b_683georgestreet_0033880_151204 ***",

	"define" : "#d_b_683georgestreet_0033880_151204 ***",
	"name" : "citymark building",
	"type" : "#a_space",
	"leveltop" : "6",
	"levelbottom" : "-3",
	"entrances" : "3",
	"use" : "#u_commercial",

	"map" : "https://console.aunsw.88.io/?redirect=draw&list=-33.8799587,151.2045493:-33.8799123,151.2044604:-33.8797920,151.2045481:-33.8796675,151.2046389:-33.8796333,151.2047587:-33.8796373,151.2047824:-33.8796952,151.2047645:-33.8797637,151.2050749:-33.8798504,151.2050452:-33.8798506,151.2050452:-33.8798871,151.2050327:-33.8799495,151.2050100:-33.8799227,151.2048921:-33.8799148,151.2048570:-33.8798950,151.2047696:-33.8798896,151.2047458:-33.8798616,151.2046229:-33.8798527,151.2045836:-33.8799009,151.2045677:-33.8799587,151.2045493&spacePt=151.2046349,-33.8796701",

	"waypt" : ["-33.8799587,151.2045493",
		"-33.8799123,151.2044604",
		"-33.8797920,151.2045481",
		"-33.8796675,151.2046389",
		"-33.8796333,151.2047587",
		"-33.8796373,151.2047824",
		"-33.8796952,151.2047645",
		"-33.8797637,151.2050749",
		"-33.8798504,151.2050452",
		"-33.8798506,151.2050452",
		"-33.8798871,151.2050327",
		"-33.8799495,151.2050100",
		"-33.8799227,151.2048921",
		"-33.8799148,151.2048570",
		"-33.8798950,151.2047696",
		"-33.8798896,151.2047458",
		"-33.8798616,151.2046229",
		"-33.8798527,151.2045836",
		"-33.8799009,151.2045677",
		"-33.8799587,151.2045493"],
	"centroid" : "-33.879833,151.204776",

	"pin" : "#pin_b9vmtckwg81kycmmuugvj95tytp9qzkvjdpftcwp",
	"alias" : "#alias_mpwgq2evox3zinq1tbt0rvilmdsgipkwijoy33dj",

	"srcname" : "console.aunsw.88.io",
	"srcarea" : "#a_0033880_151204",
	"srctime" : "#t_1750296600",
	"srctx" : "#tx_rnjrifdjolh85gw53qsteqeca4wralhvppn4ufc9",
	"srcsign" : "sWiCqRVPYqtpwPr5DPo2QORdLSL5_CtHeXWDDdpZEGqXFQu9_Hdvy275aq6C4mJDpymvY9C1N3TnRQsd2nYgAg"
}